Generate documents in bulk
Upload a CSV file and generate one document, or one workflow run, per row.
Need a certificate for every attendee, a letter for every employee or an invoice for every customer? Put the data in a spreadsheet, export it as a CSV file, and let TemplateDocs process one row at a time.
There are two ways to do it:
- Generate in bulk from Quick Document - one document per row, straight from a template, downloaded together as a zip file. Best for a quick batch you'll handle yourself.
- Bulk Start a workflow - one workflow run per row, with everything the workflow does: logic, document generation, email delivery, storage and integrations. Best when each document needs to go somewhere.
Prepare the CSV file
Whichever way you choose, the CSV file looks the same:
- The first row contains the column headers.
- Every following row is one document (or one workflow run).
- For Quick Document, name columns after the template tags. For a workflow, use the form field labels or webhook body-field paths. Matching names are connected automatically.
Both bulk dialogs offer a ready-made CSV template with one column per supported tag or mappable field. Download it, fill it in with your spreadsheet application, and export it as CSV.
Generate in bulk from Quick Document
- Open the template page and switch to the Quick Document tab.
- Choose DOCX or PDF, then click Bulk...
- Upload your CSV file.
- Map the columns to the template's tags. Columns with the same name as a tag are matched automatically.
- Check the preview lines, then click Generate N Documents. One document is generated per row, and all of them are downloaded as a single zip file.
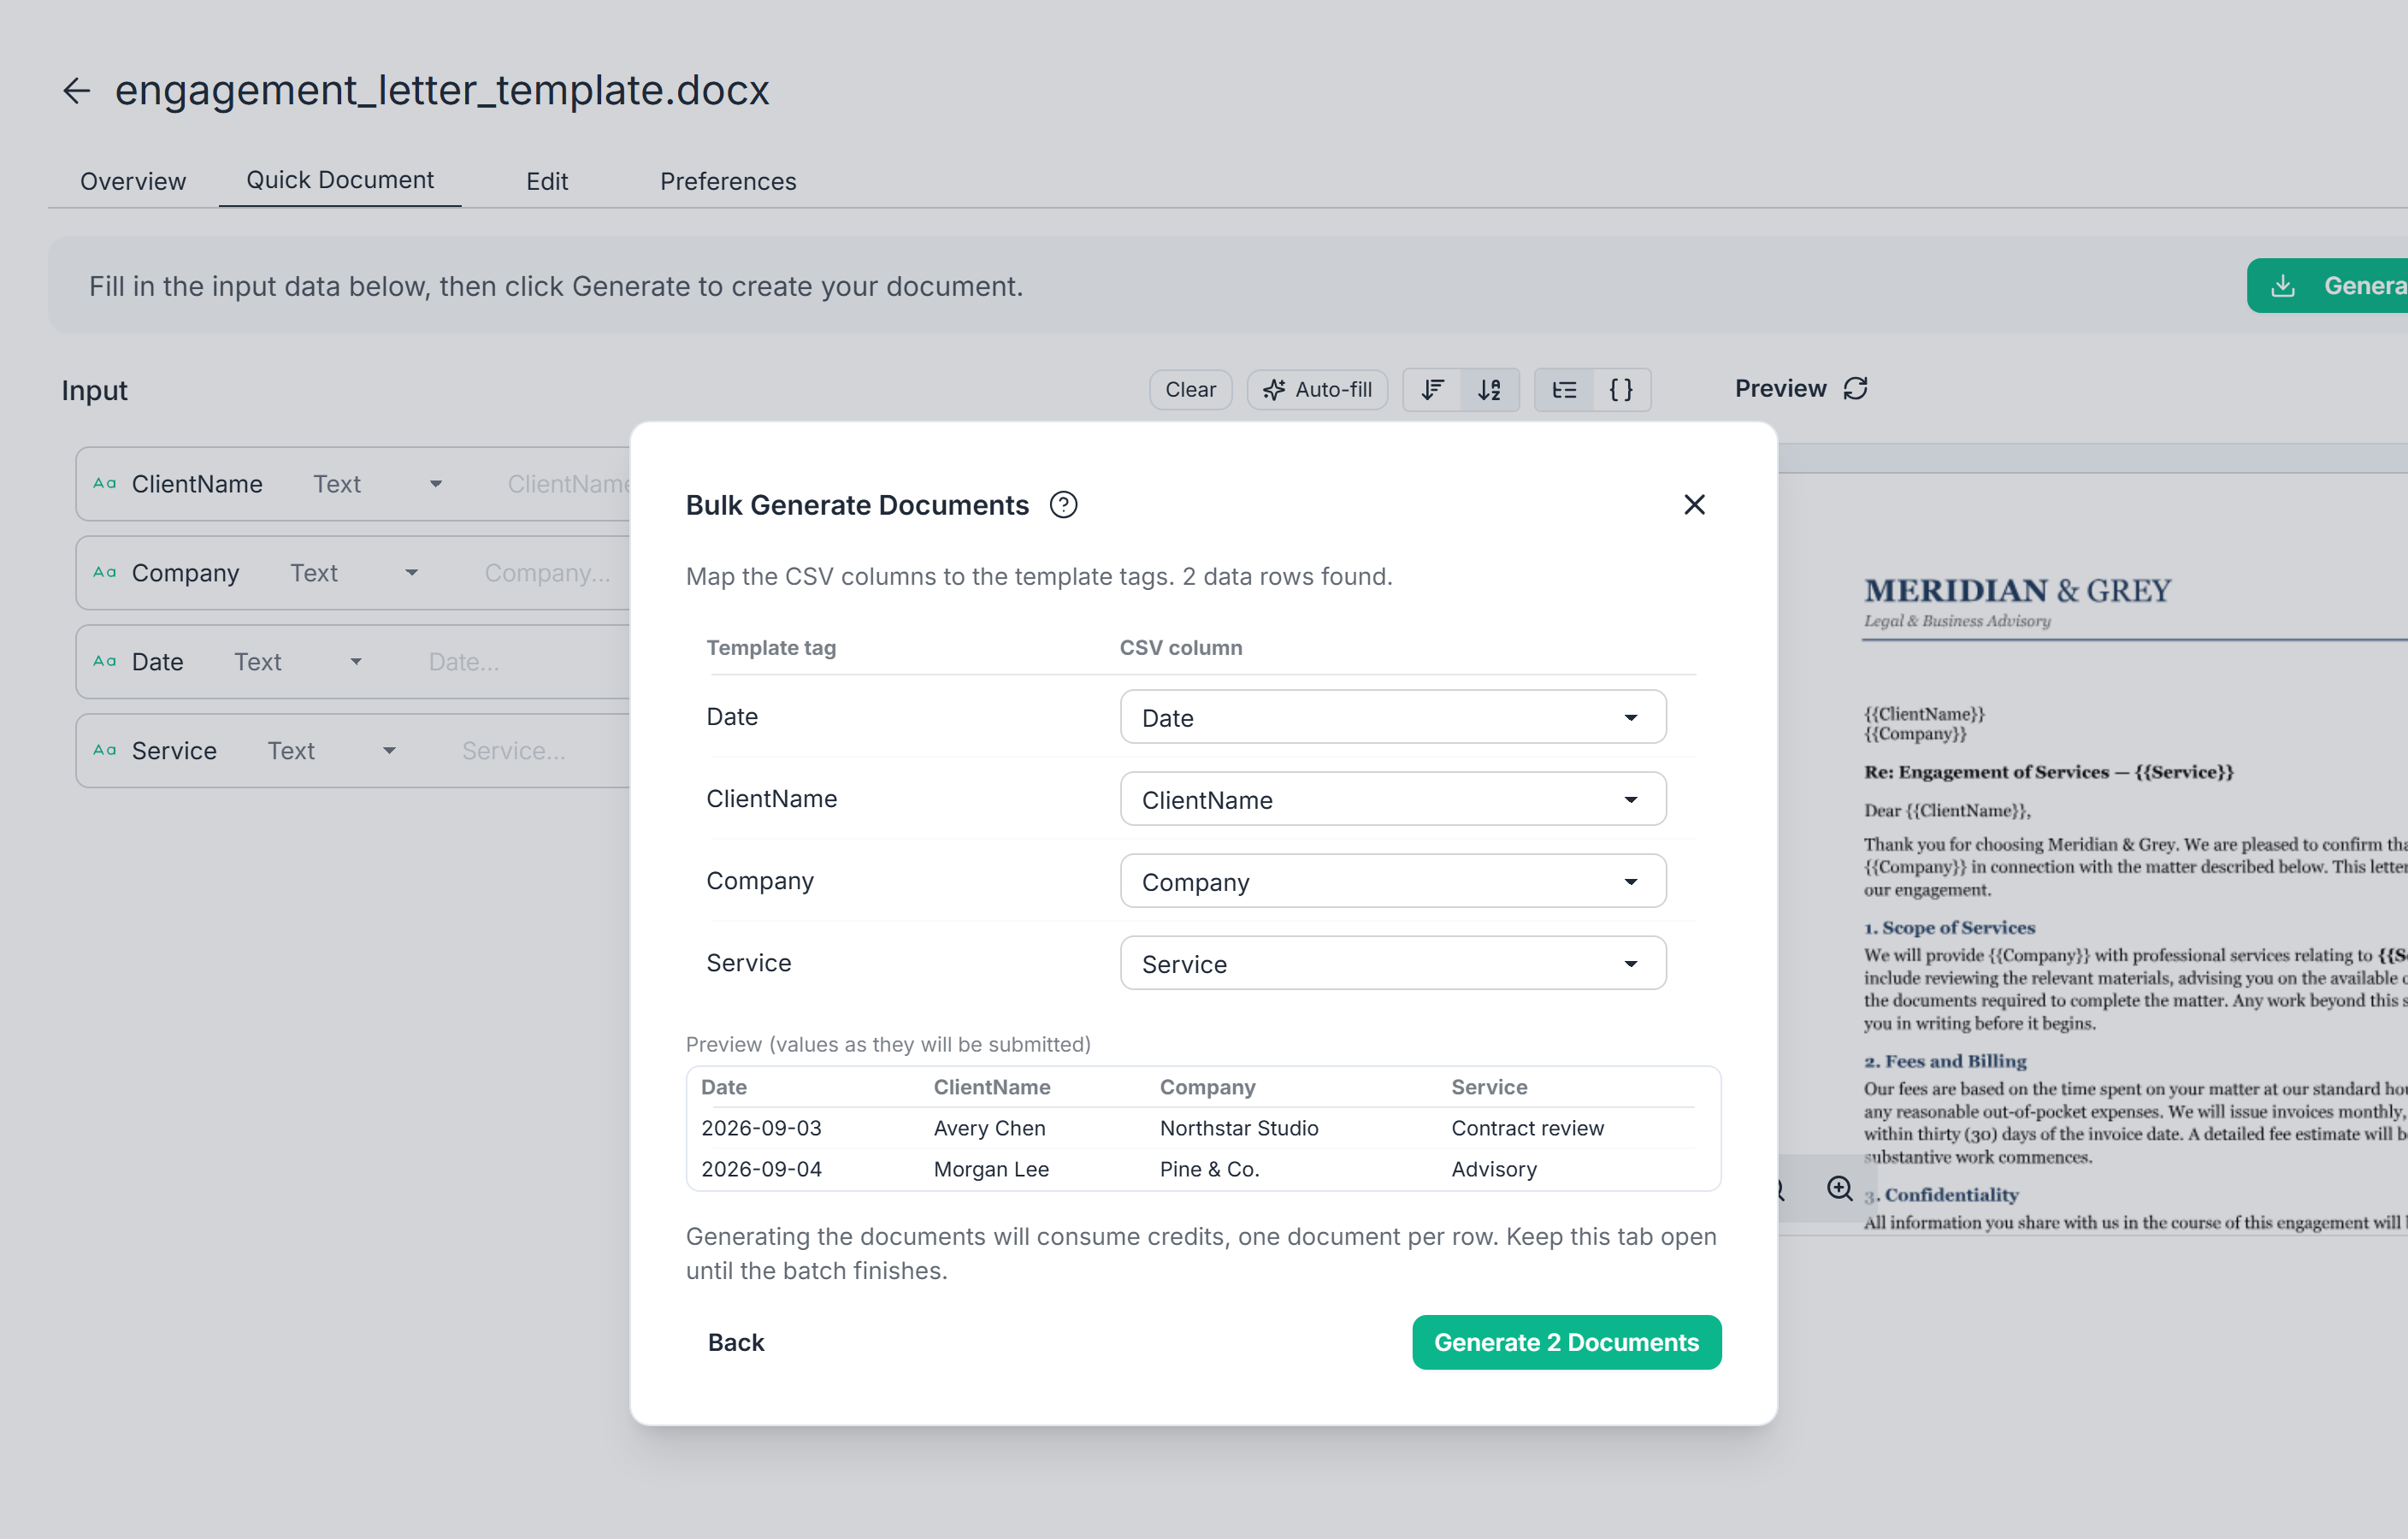
Keep the browser tab open until generation finishes. Closing it early stops the batch. When the batch completes, the zip file downloads automatically.
Text tags are filled with the cell value as-is. Condition tags accept
true/false, yes/no or 1/0. Loop tags and media tags (images, links,
QR codes, barcodes) can't be filled from a flat CSV file - use a workflow for
those.
Bulk Start a workflow
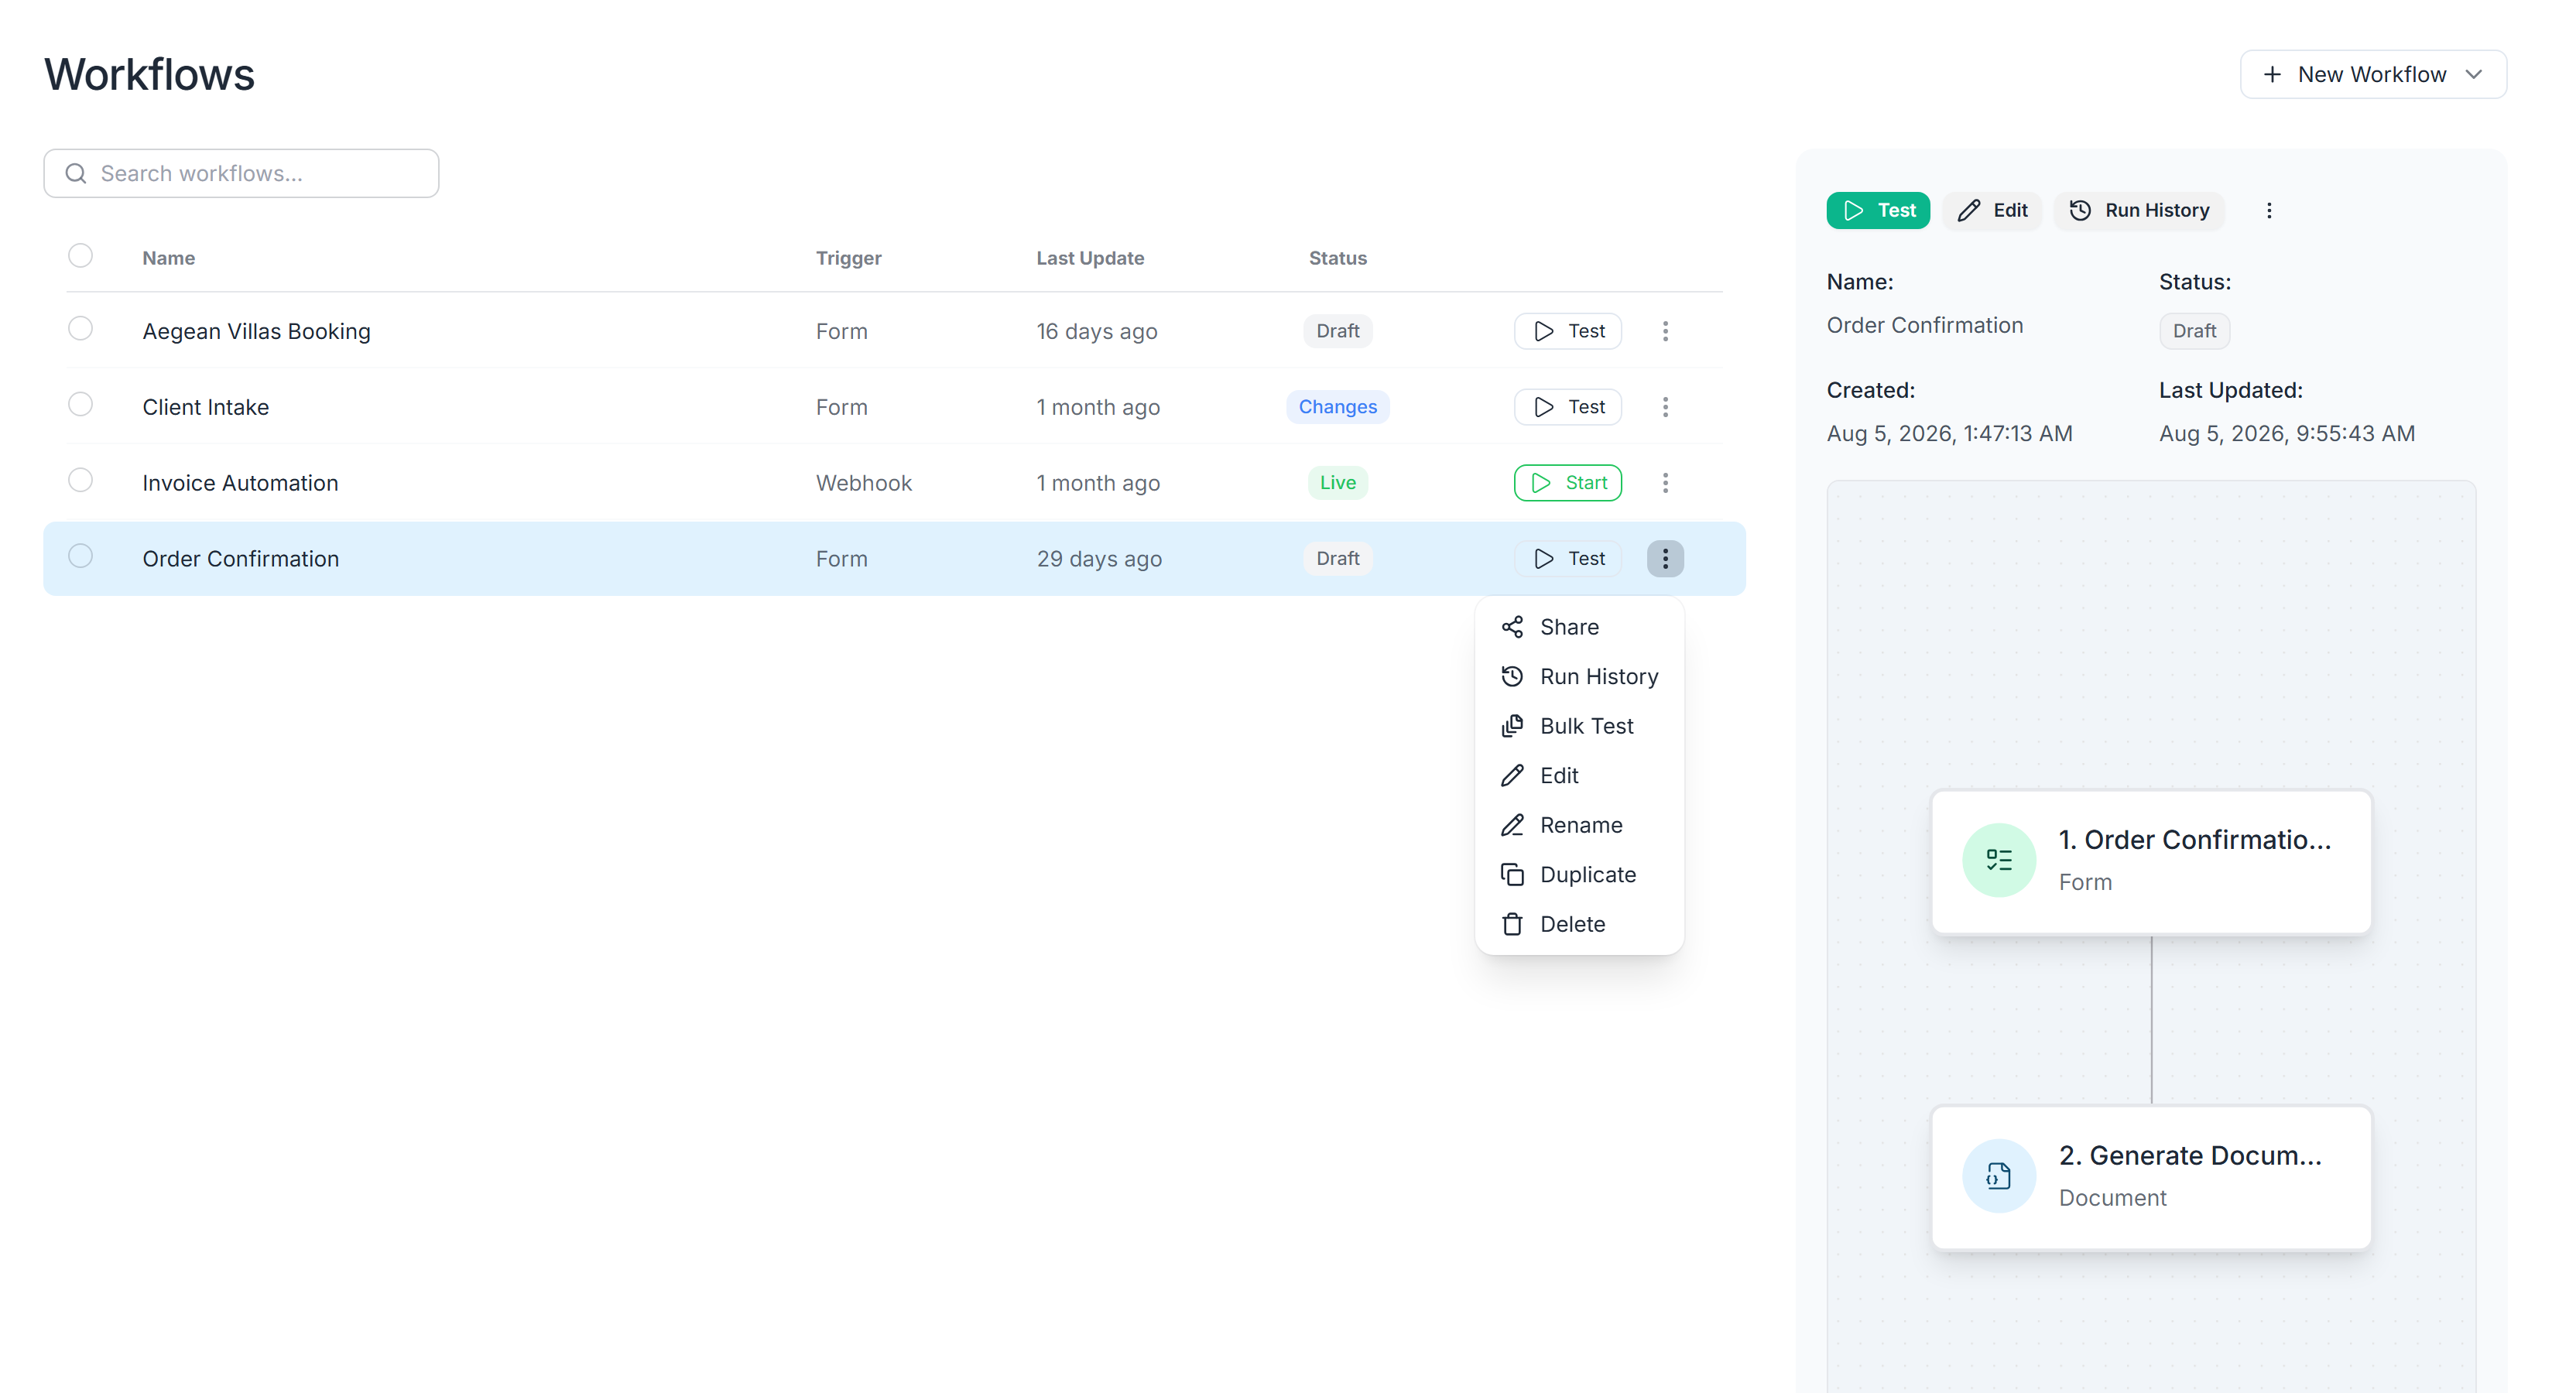
- Open the Workflows page and choose Bulk Start (or Bulk Test if the workflow is not published yet) from the workflow's context menu. It is also available from the menu of the workflow designer.
- Upload your CSV file.
- Map the columns to the form fields, or to the webhook's data fields if the workflow is triggered by a webhook. A preview shows the first rows as they will be submitted.
- Click Continue, review any validation results, then click Start N runs. Each accepted row starts its own workflow run.
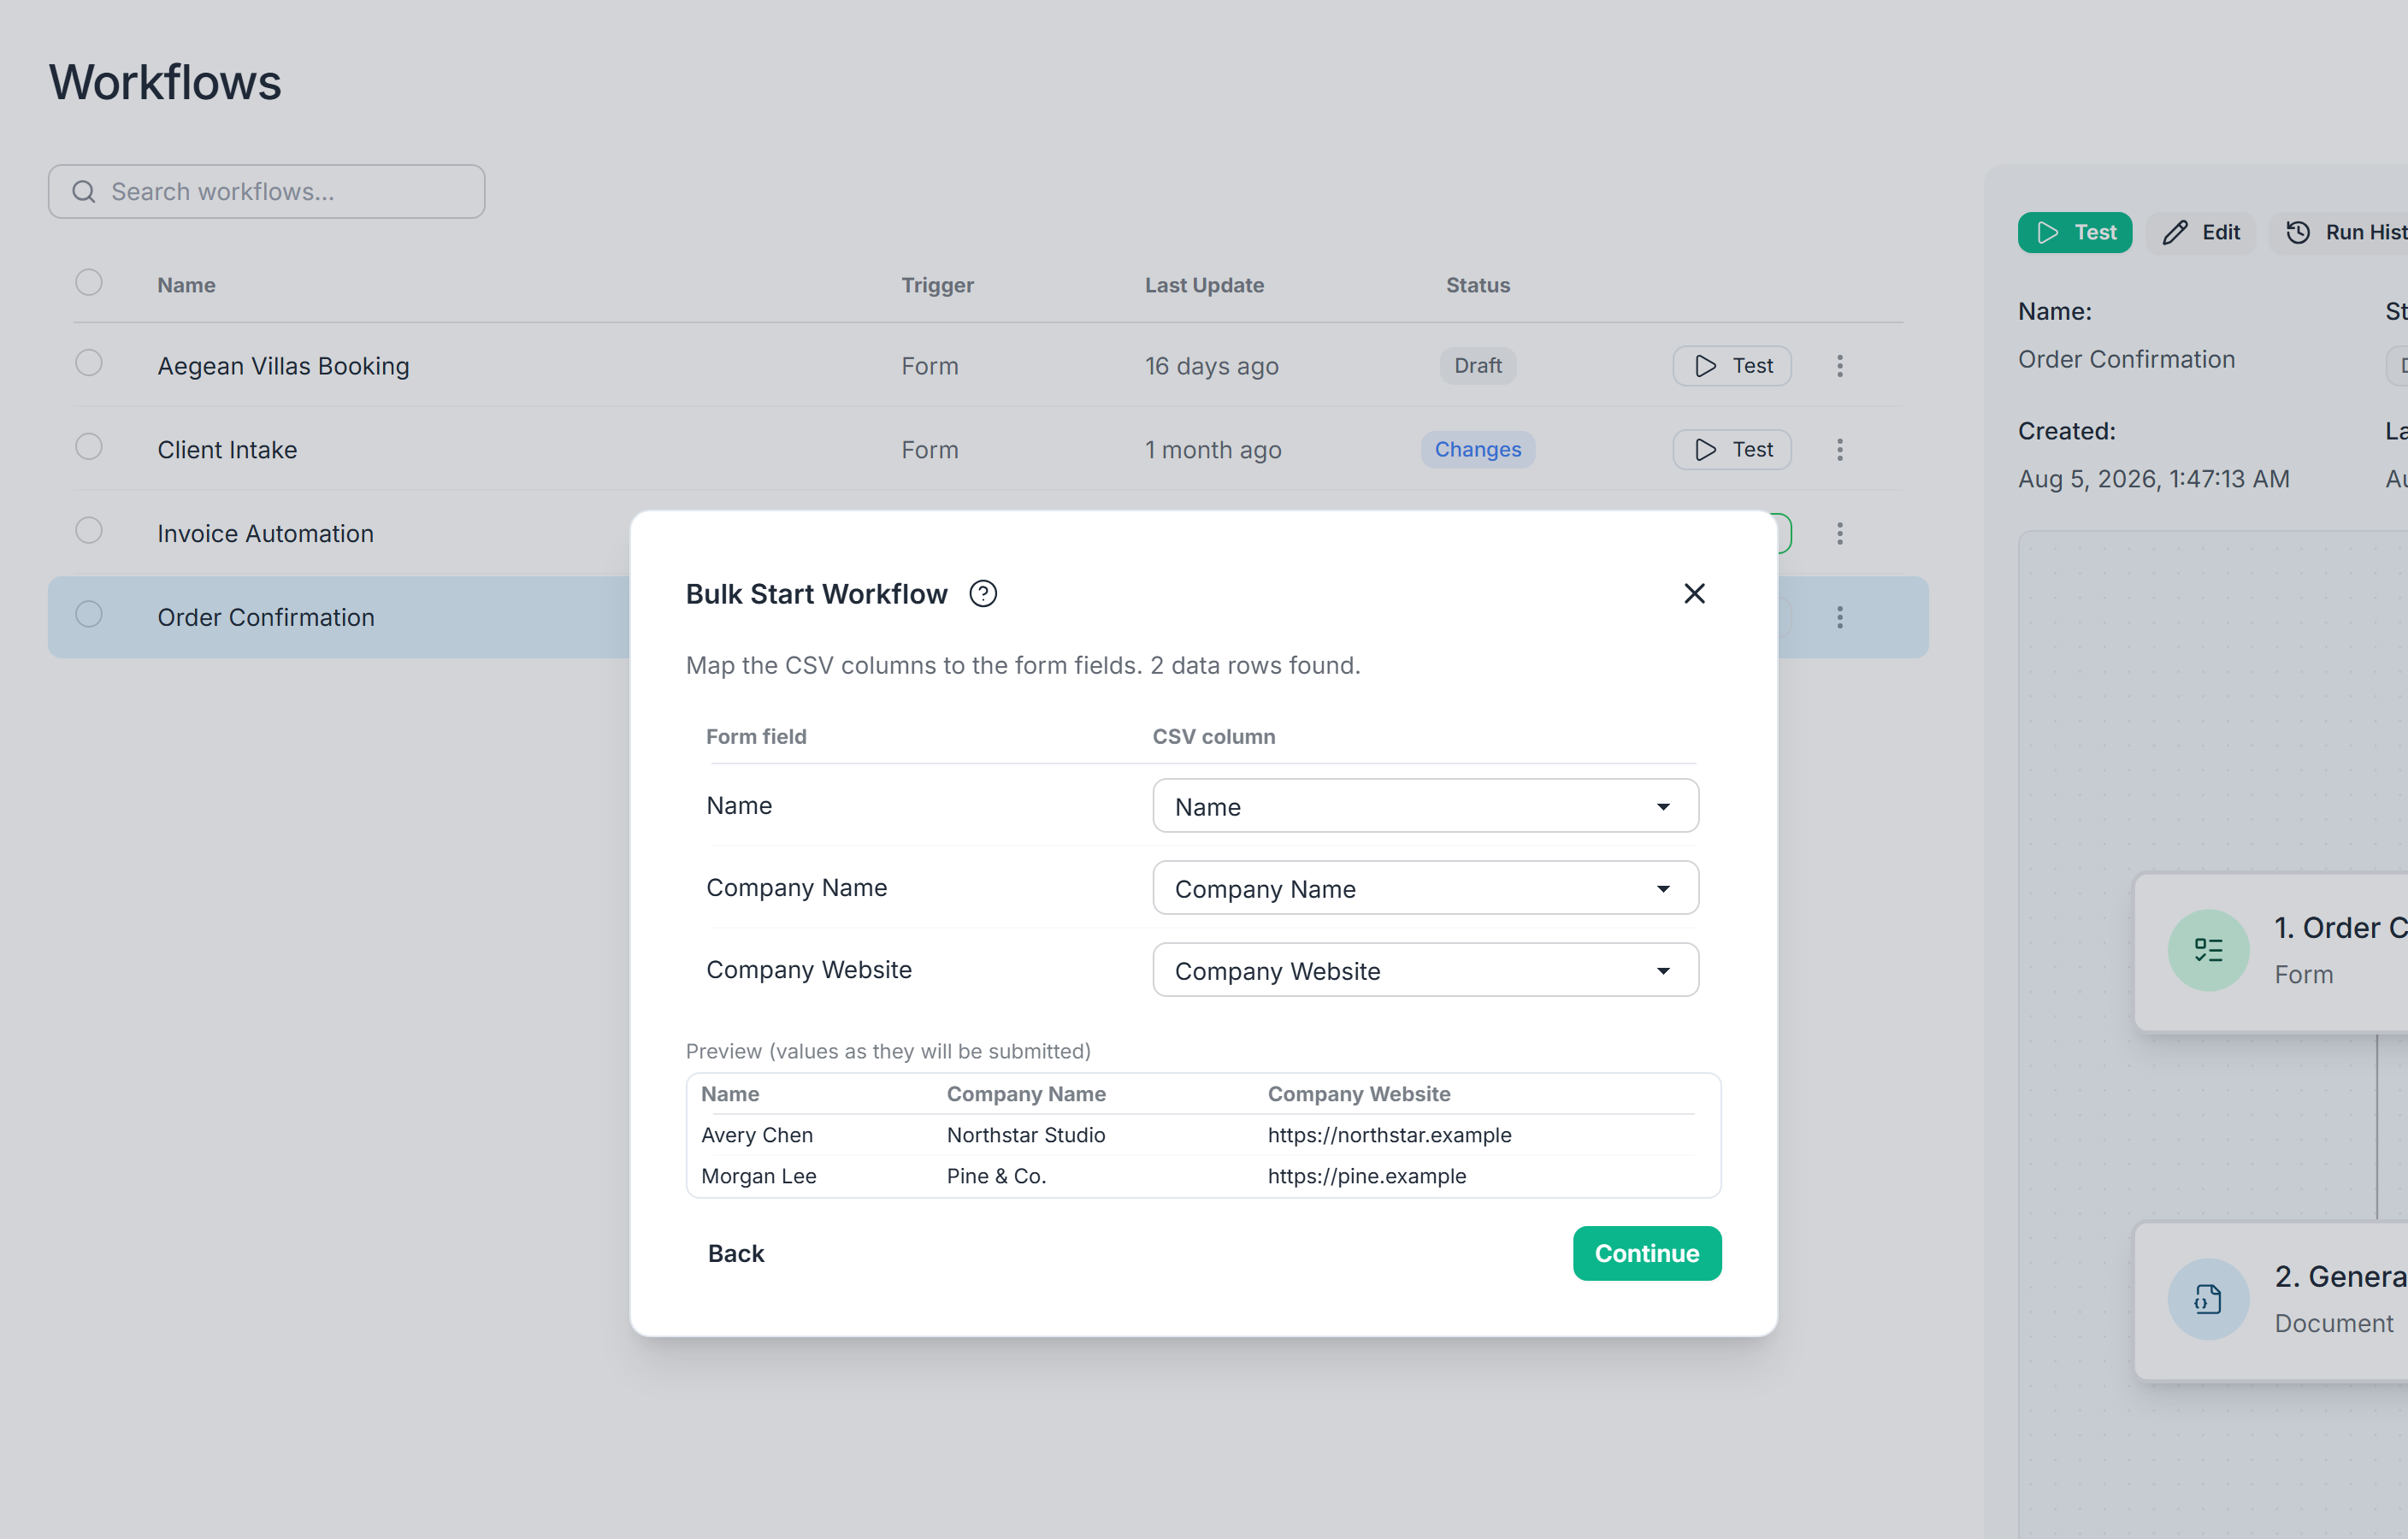
A progress screen tracks the batch live. You can close it at any time - the runs continue in the background. The batch can be stopped and the remaining runs can be cancelled through the Cancel batch button or via the workflow's Run History page.
Find workflow results
Open the workflow's Run History after starting the batch. Use Runs to inspect each execution, Submissions to review its input data, and Documents to preview or download the generated files.
Credits
Each workflow run in a batch is billed like a regular run, and each Quick Document like a regular document generation. See Credits for the details.
Limits
- Quick Document: up to 25 data rows in a single batch.
- Workflow: up to 100 data rows in a single batch.
Next Steps
- Automate document delivery with your first workflow.
- Learn how to create a template.
- Send data from another app using webhook triggers.
