Build your first workflow
Collect data with a form, generate a document and deliver it automatically.
A workflow is a series of steps that run automatically when something happens, such as a client submitting a form. Instead of collecting data by email and filling in documents by hand, the workflow collects the data, generates the documents and delivers them - the same way, every time.
In this guide you'll build one of the most common workflows - a form that generates a document and sends it by email.
You will need a template before you begin. If you do not have one yet, you can download our workshop confirmation template which we use in this guide. Alternatively, you can follow the steps in our guide to Create your first template or Create a template with AI.
1. Create the workflow
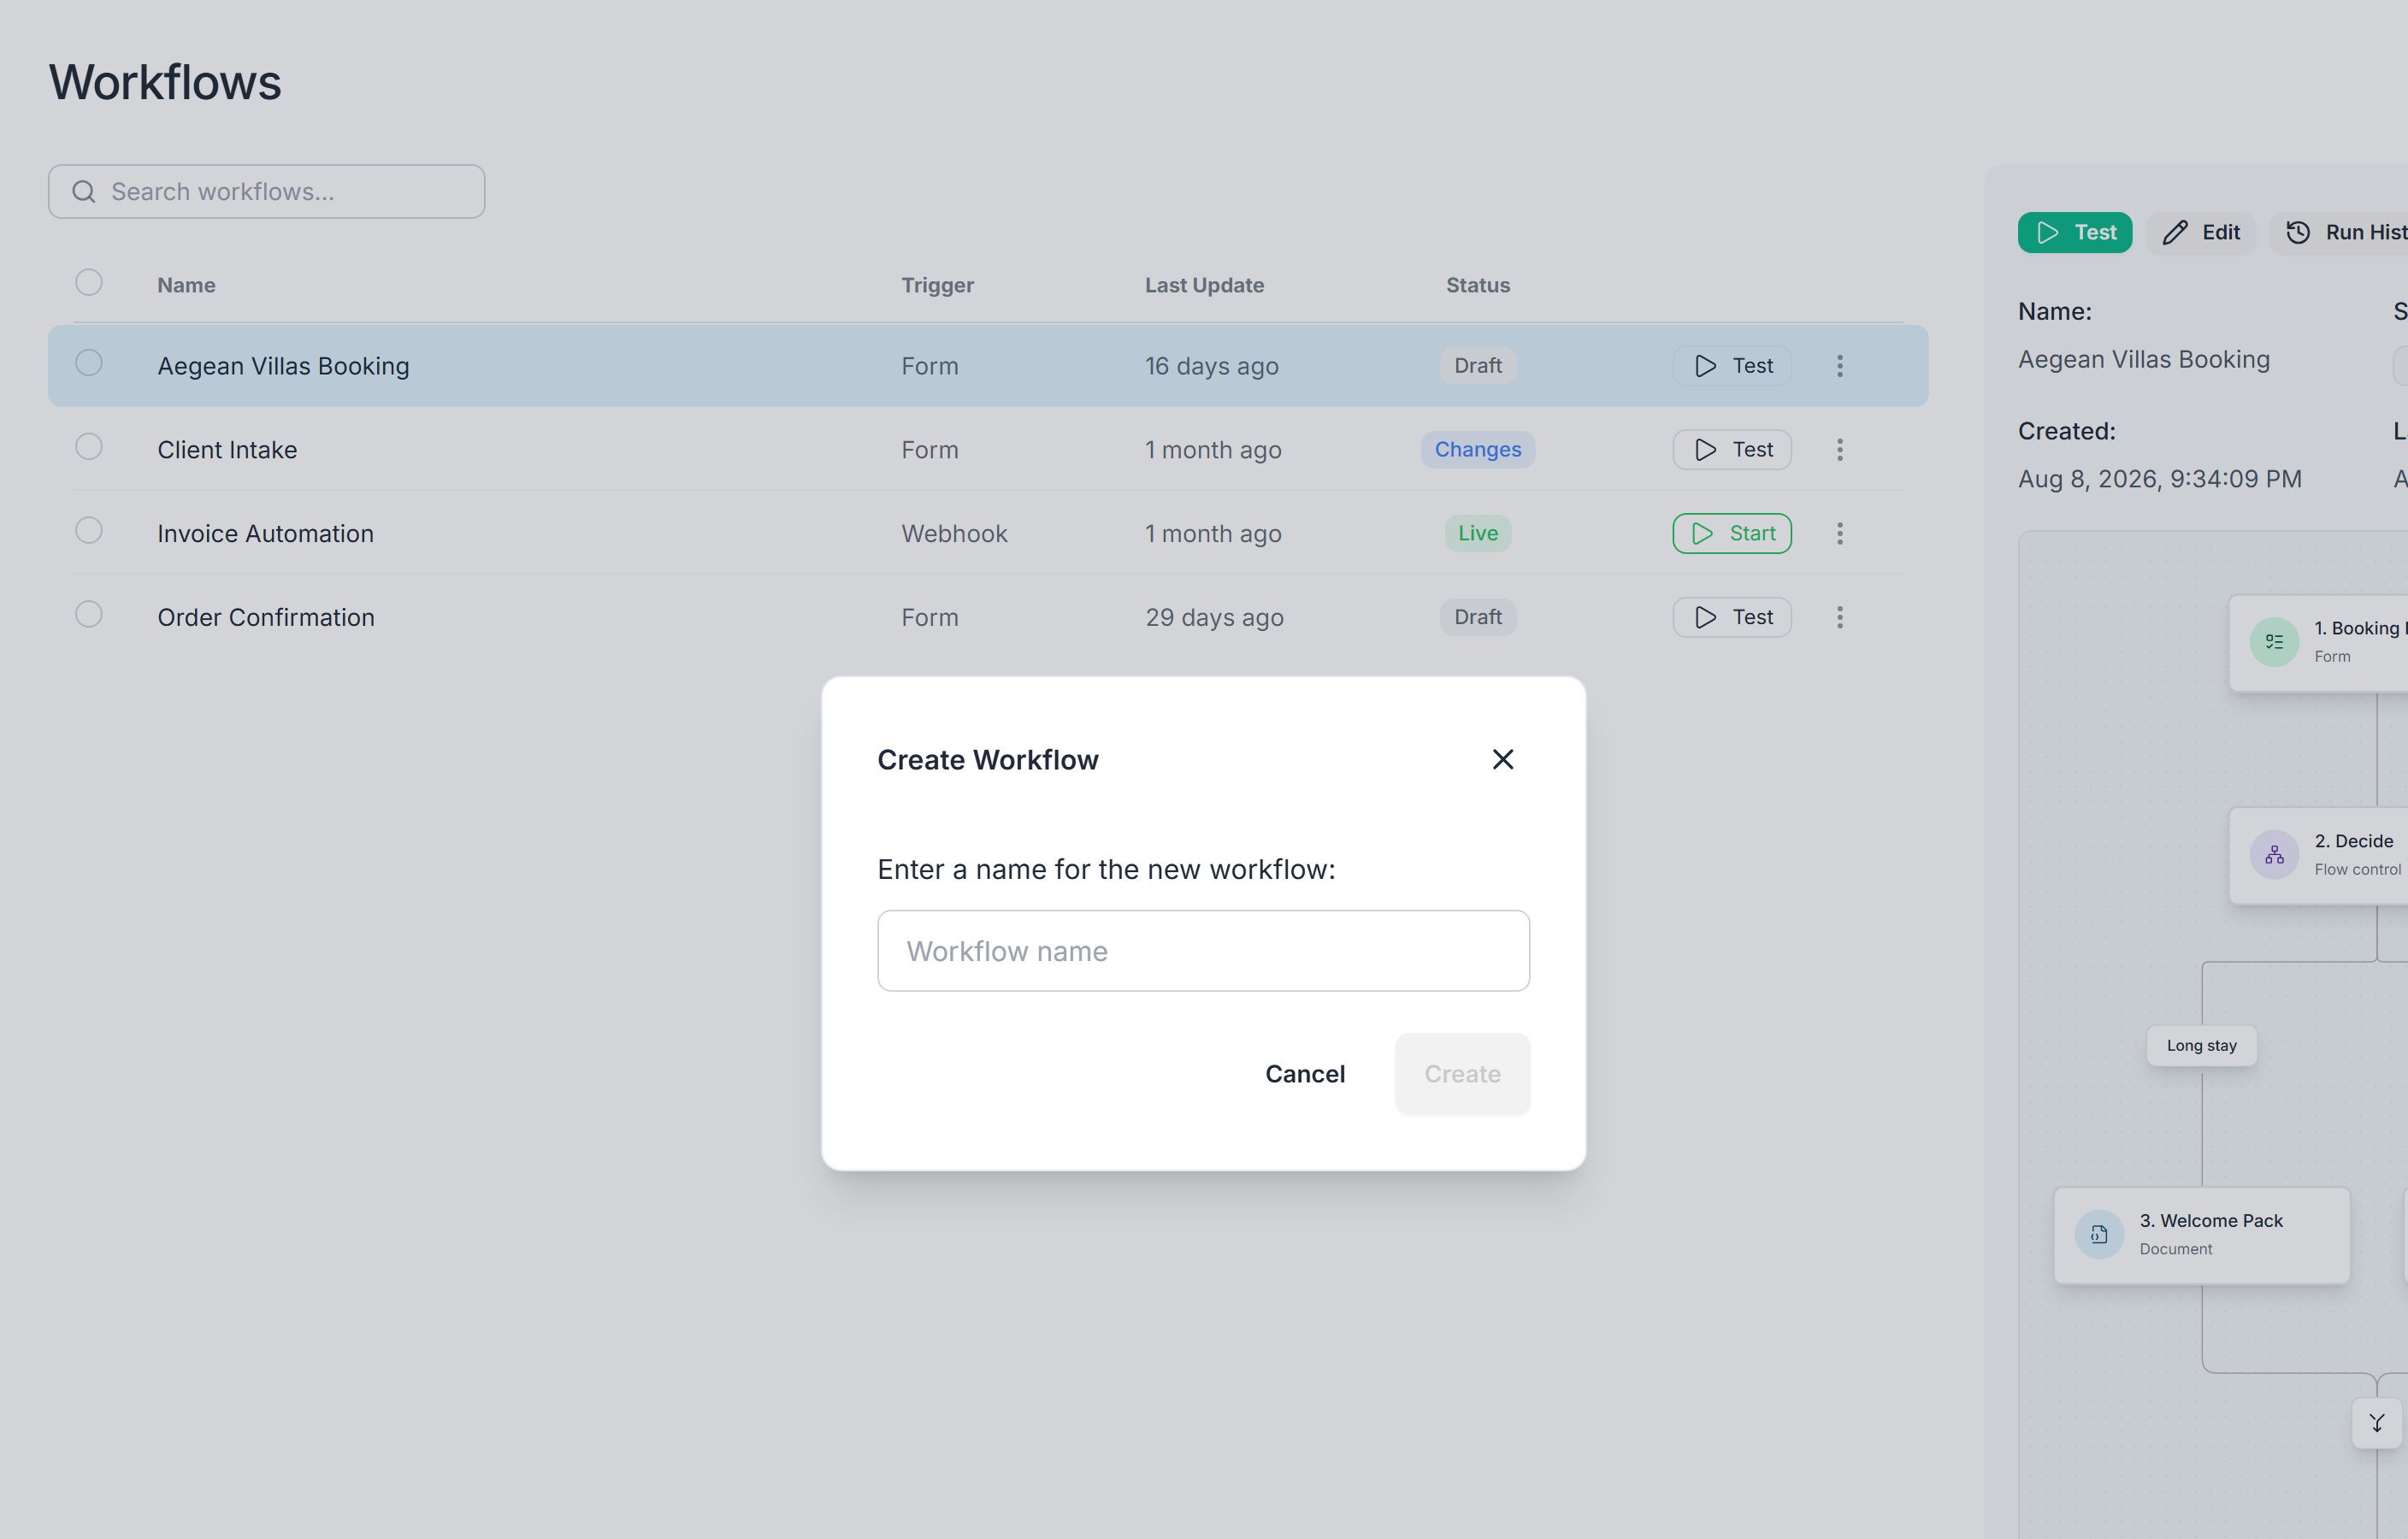
- Open the Workflows page and click New Workflow.
- Give the workflow a name, for example "Workshop Registration", and confirm.
The workflow designer opens with a trigger picker. A trigger is what starts the workflow, followed by the steps that run afterwards.
Not sure where to start? The Workflows page also offers sample workflows, such as an employee welcome letter, a lease agreement and an invoice. Pick one and adjust it instead of starting from scratch.
2. Set up the form trigger
A form is the easiest way to collect the data your document needs:
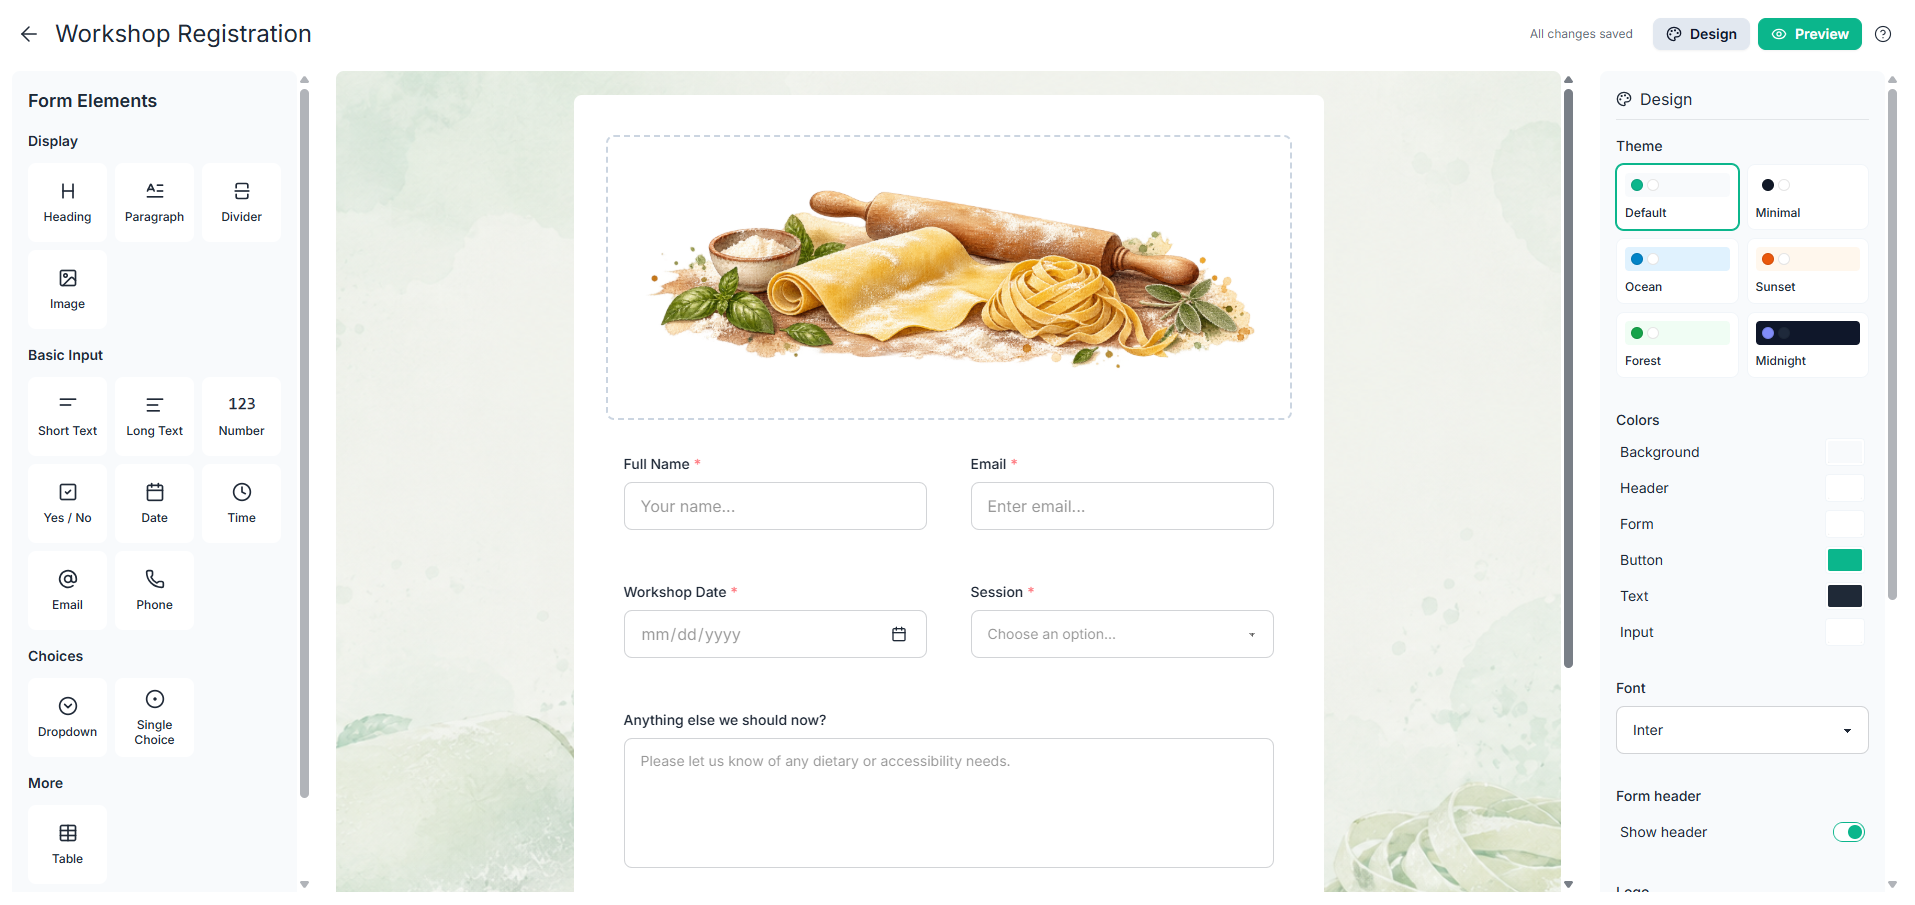
- Select the form trigger and open the form designer.
- Add a field for every piece of information you need - text, numbers, dates, choices, and so on. Each input creates a workflow variable you can use in later steps.
- Configure labels, required fields and validation.
- Click the Design button to adjust the form's look and feel if you like.
- Click Preview to check the form as a respondent will see it.
- When you are done, return to the workflow.
Workflows can also be triggered by a webhook from another system, which is useful when the data already lives in a CRM or a spreadsheet.
3. Generate a document
- Add a Document step after the trigger.
- Choose the template to use.
- Adjust the generated document's name if needed, then choose the output format (PDF or DOCX).
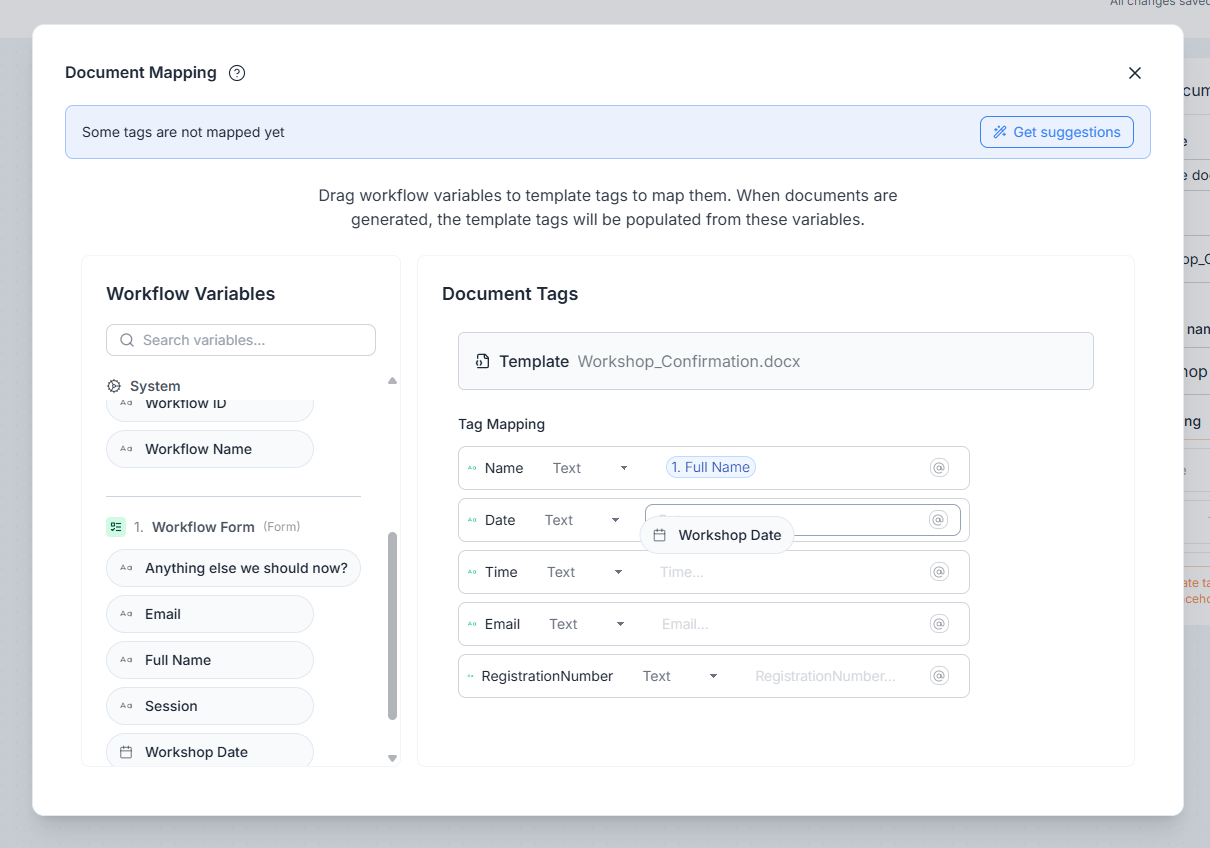
- Edit the Document Tag Mapping, they control how values are inserted into the
document template.
- You can drag-and-drop form values and workflow variables onto the mapping fields, type them manually or use the variable picker.
- You can also click the Get suggestions button to let TemplateDocs suggest mappings for you.
Values don't have to come straight from the form. Formulas let you calculate totals, format dates or combine fields before they land in the document.
4. Deliver the document
Add an Email step after the Document step:
- Enter a fixed recipient, such as your sales inbox, or a value from the form, such as the client's email.
- Write the subject and message. Type
@in the recipient, subject or message fields to insert values from the form or earlier workflow steps. - Click Add Attachment and select the file created by the Document step.
The built-in email provider works without additional setup. See Email Delivery for provider options and limits.
Documents can also be saved to cloud storage, sent to other tools through integrations, or returned to your own systems - see the full list of steps here.
5. Test and publish
Changes in the workflow designer are saved automatically as a draft. Before publishing, test your workflow to make sure everything works as expected:
- Click Test in the top bar.
- Enter sample form values, or choose Auto-fill with AI, and submit the
form.
Note: Test runs consume credits like any other run. - Confirm that the run succeeds, the document looks right, the email arrives, and the run appears in Run History.
- When everything looks good, click Publish. Your form is now live, and you'll get a link to share it with others, and an embed snippet to add it to your website if you want.
Every run is recorded in the workflow's Run History, where you can see which steps executed, how long they took, and additional details about the run.
Changes you make after publishing are saved as a draft and don't affect the live form until you publish again.
Next Steps
- Learn how to create a template.
- Send data from another app using webhook triggers.
- See how to generate documents in bulk with CSV files.
