Create your first document
Learn the basics of TemplateDocs by creating your first document.
A template is a regular Microsoft Word document (.docx) in which the parts that
change from one document to the next are marked with tags - placeholders
written in double curly braces, like {{ CustomerName }}. When you generate a
document, every tag is replaced with the value you provide.
This guide takes you from a Word document template to your first generated document in four steps.
1. Prepare your Word document
Open the document you want to automate in Word and replace each piece of variable content with a tag. Keep the rest of the document as it is - the formatting, images, tables and styles are preserved when documents are generated.
For example, a simple order confirmation may contain:
{{ Name }}- the name of the customer{{ CompanyName }}- the name of their company{{ Total }}- the order total{{ CompanyWebsite }}- your website address
The downloadable example also uses an Items loop for the rows of the order
table. You can start with standard tags and add loops when you need repeating
content.
A few rules for tag names:
- Tags are surrounded by double curly braces:
{{and}}. - Tag names must start with an English letter and can contain English letters, numbers and underscores. No spaces or dashes.
- Tag names are case-sensitive:
{{ Name }}and{{ name }}are two different tags. - Spaces before or after the tag name are ignored. So
{{ Name }}and{{Name}}are the same tag.
Hello {{Name}},
Thank you for your order from {{CompanyName}}.
| Item | Price |
|---|---|
| {{ >> Items }} {{Name}} | ${{Price}} {{ << }} |
Total: ${{Total}}
Your order is on its way!
Don't have a document handy? Download our order confirmation example and use it to follow along.
2. Upload the template
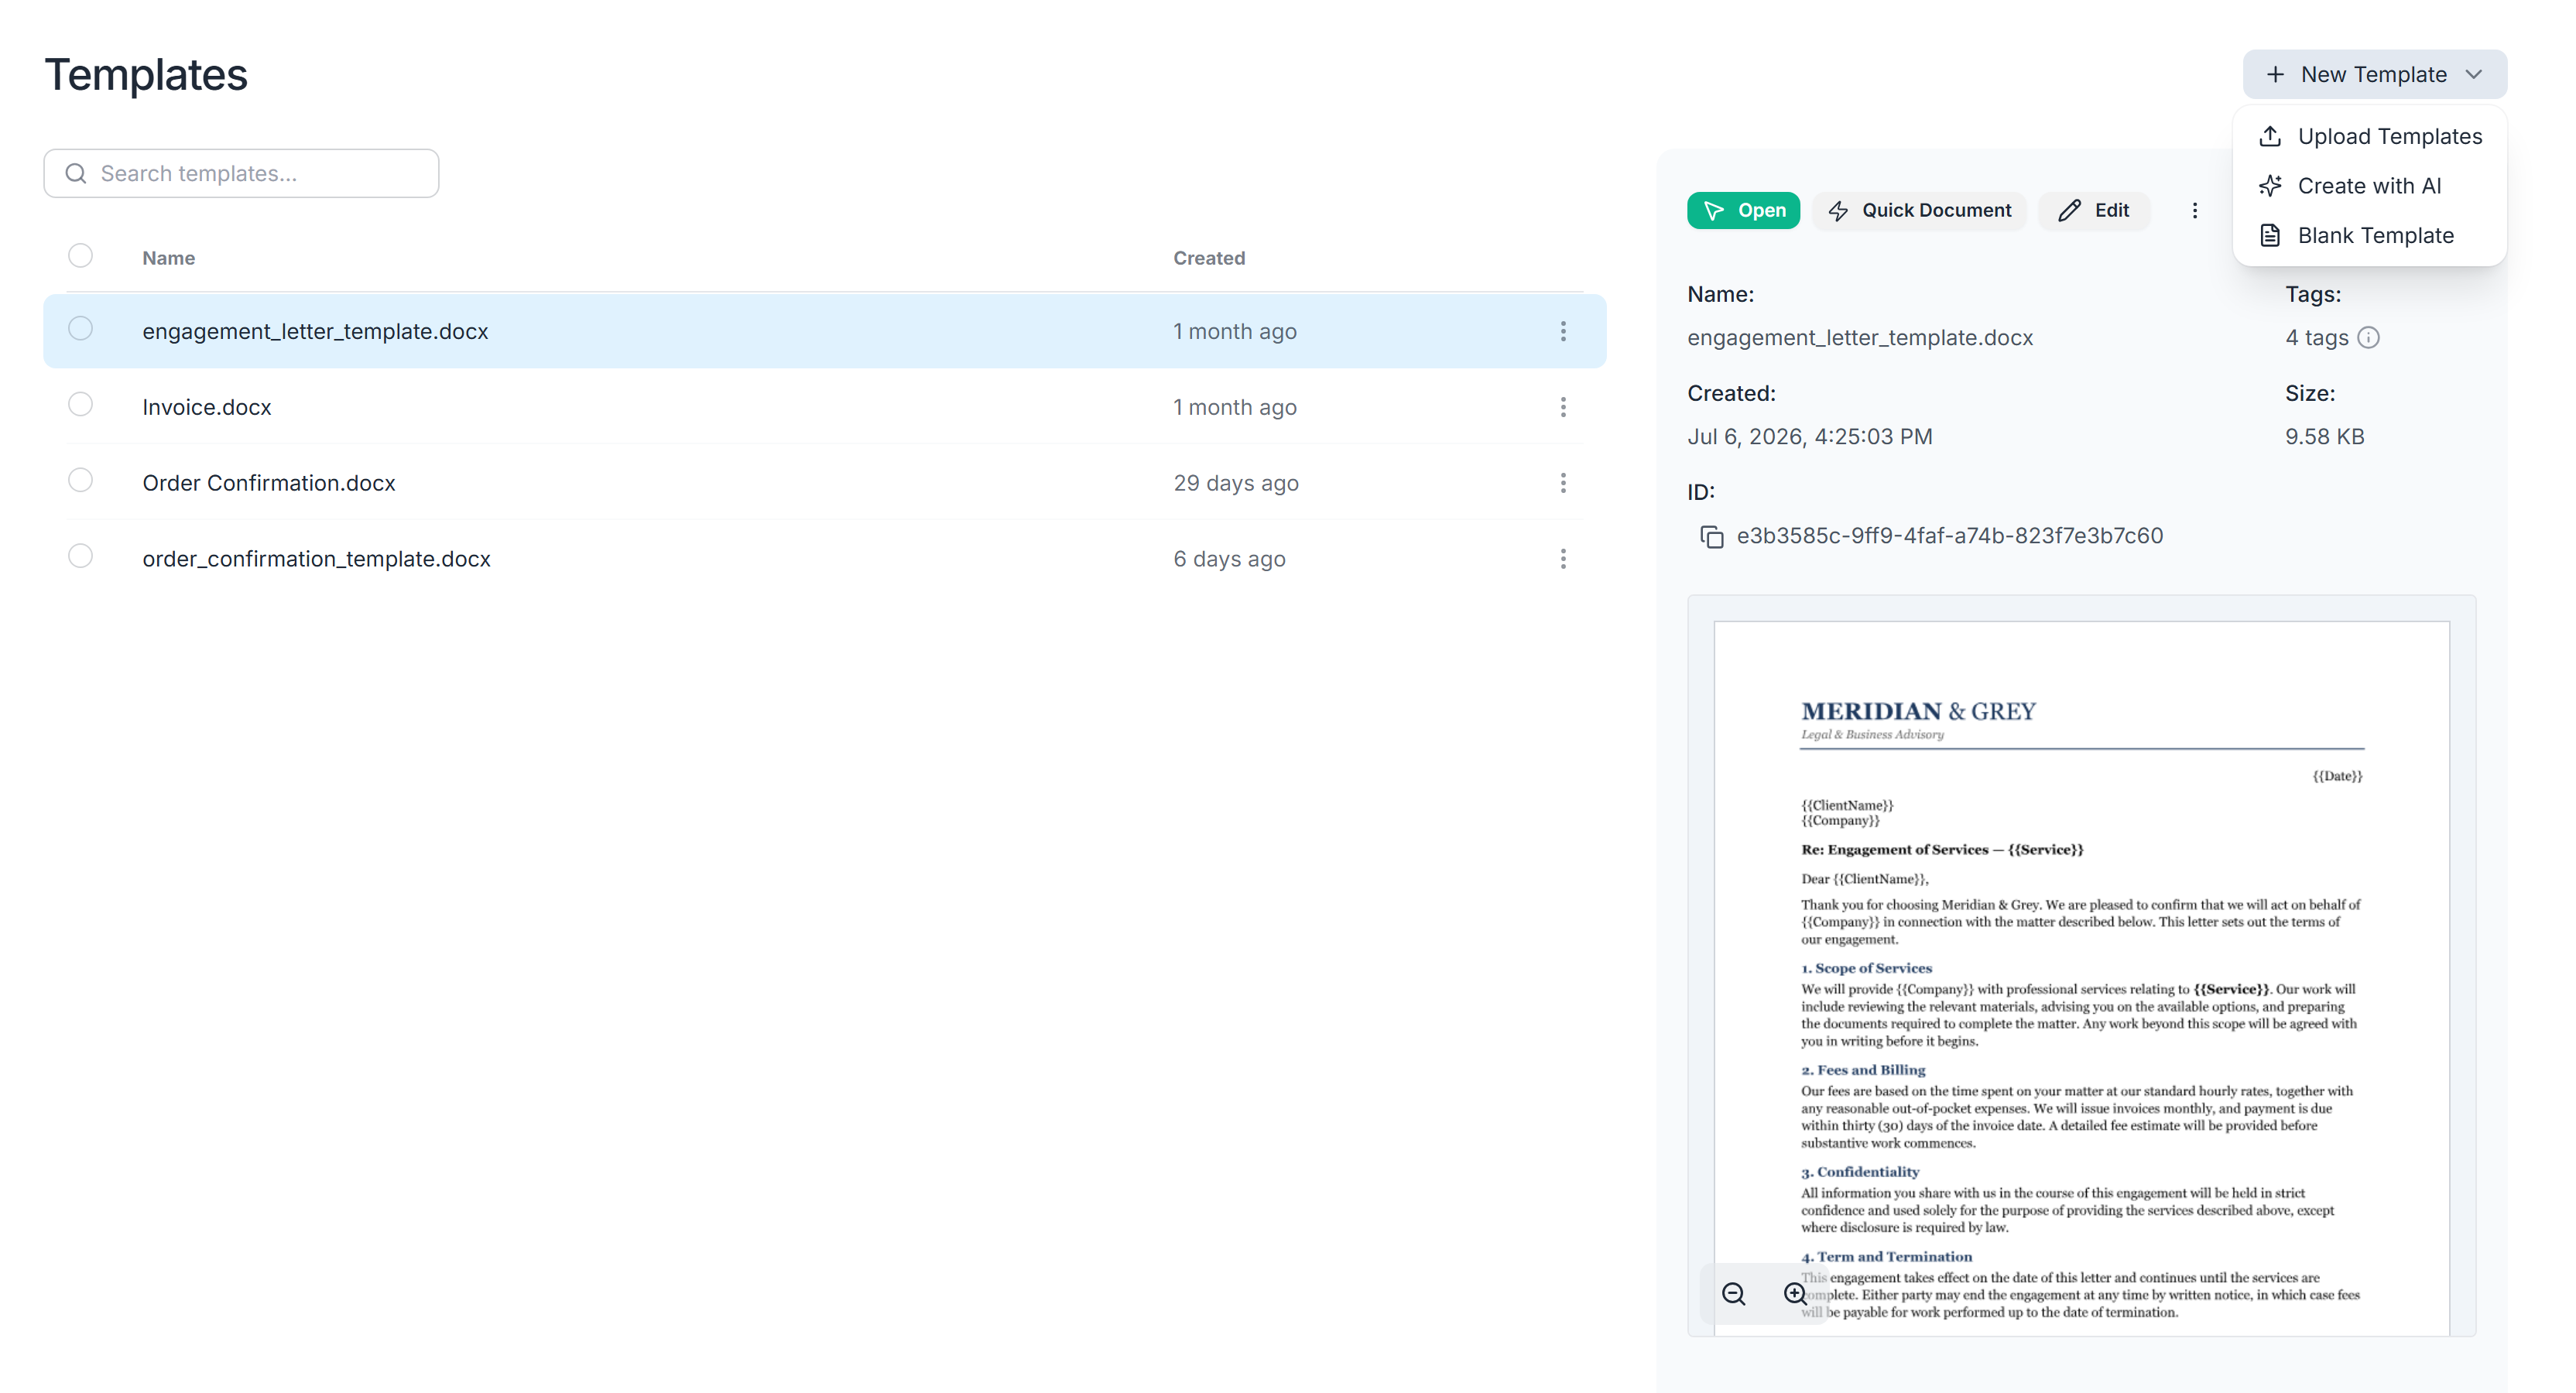
- Sign in to TemplateDocs and open the Templates page.
- If this is your first template, click Upload Template. If your library already contains templates, click New Template and choose Upload Templates.
- Choose your .docx file.
- TemplateDocs scans the uploaded file for tags and checks for common problems. If it finds an issue, the upload summary explains it and offers the relevant next steps, such as reviewing suggested fixes, editing online or re-uploading a corrected file.
Prefer to start from nothing? Click Blank Template to create an empty template and add content in the online editor instead.
3. Review the template
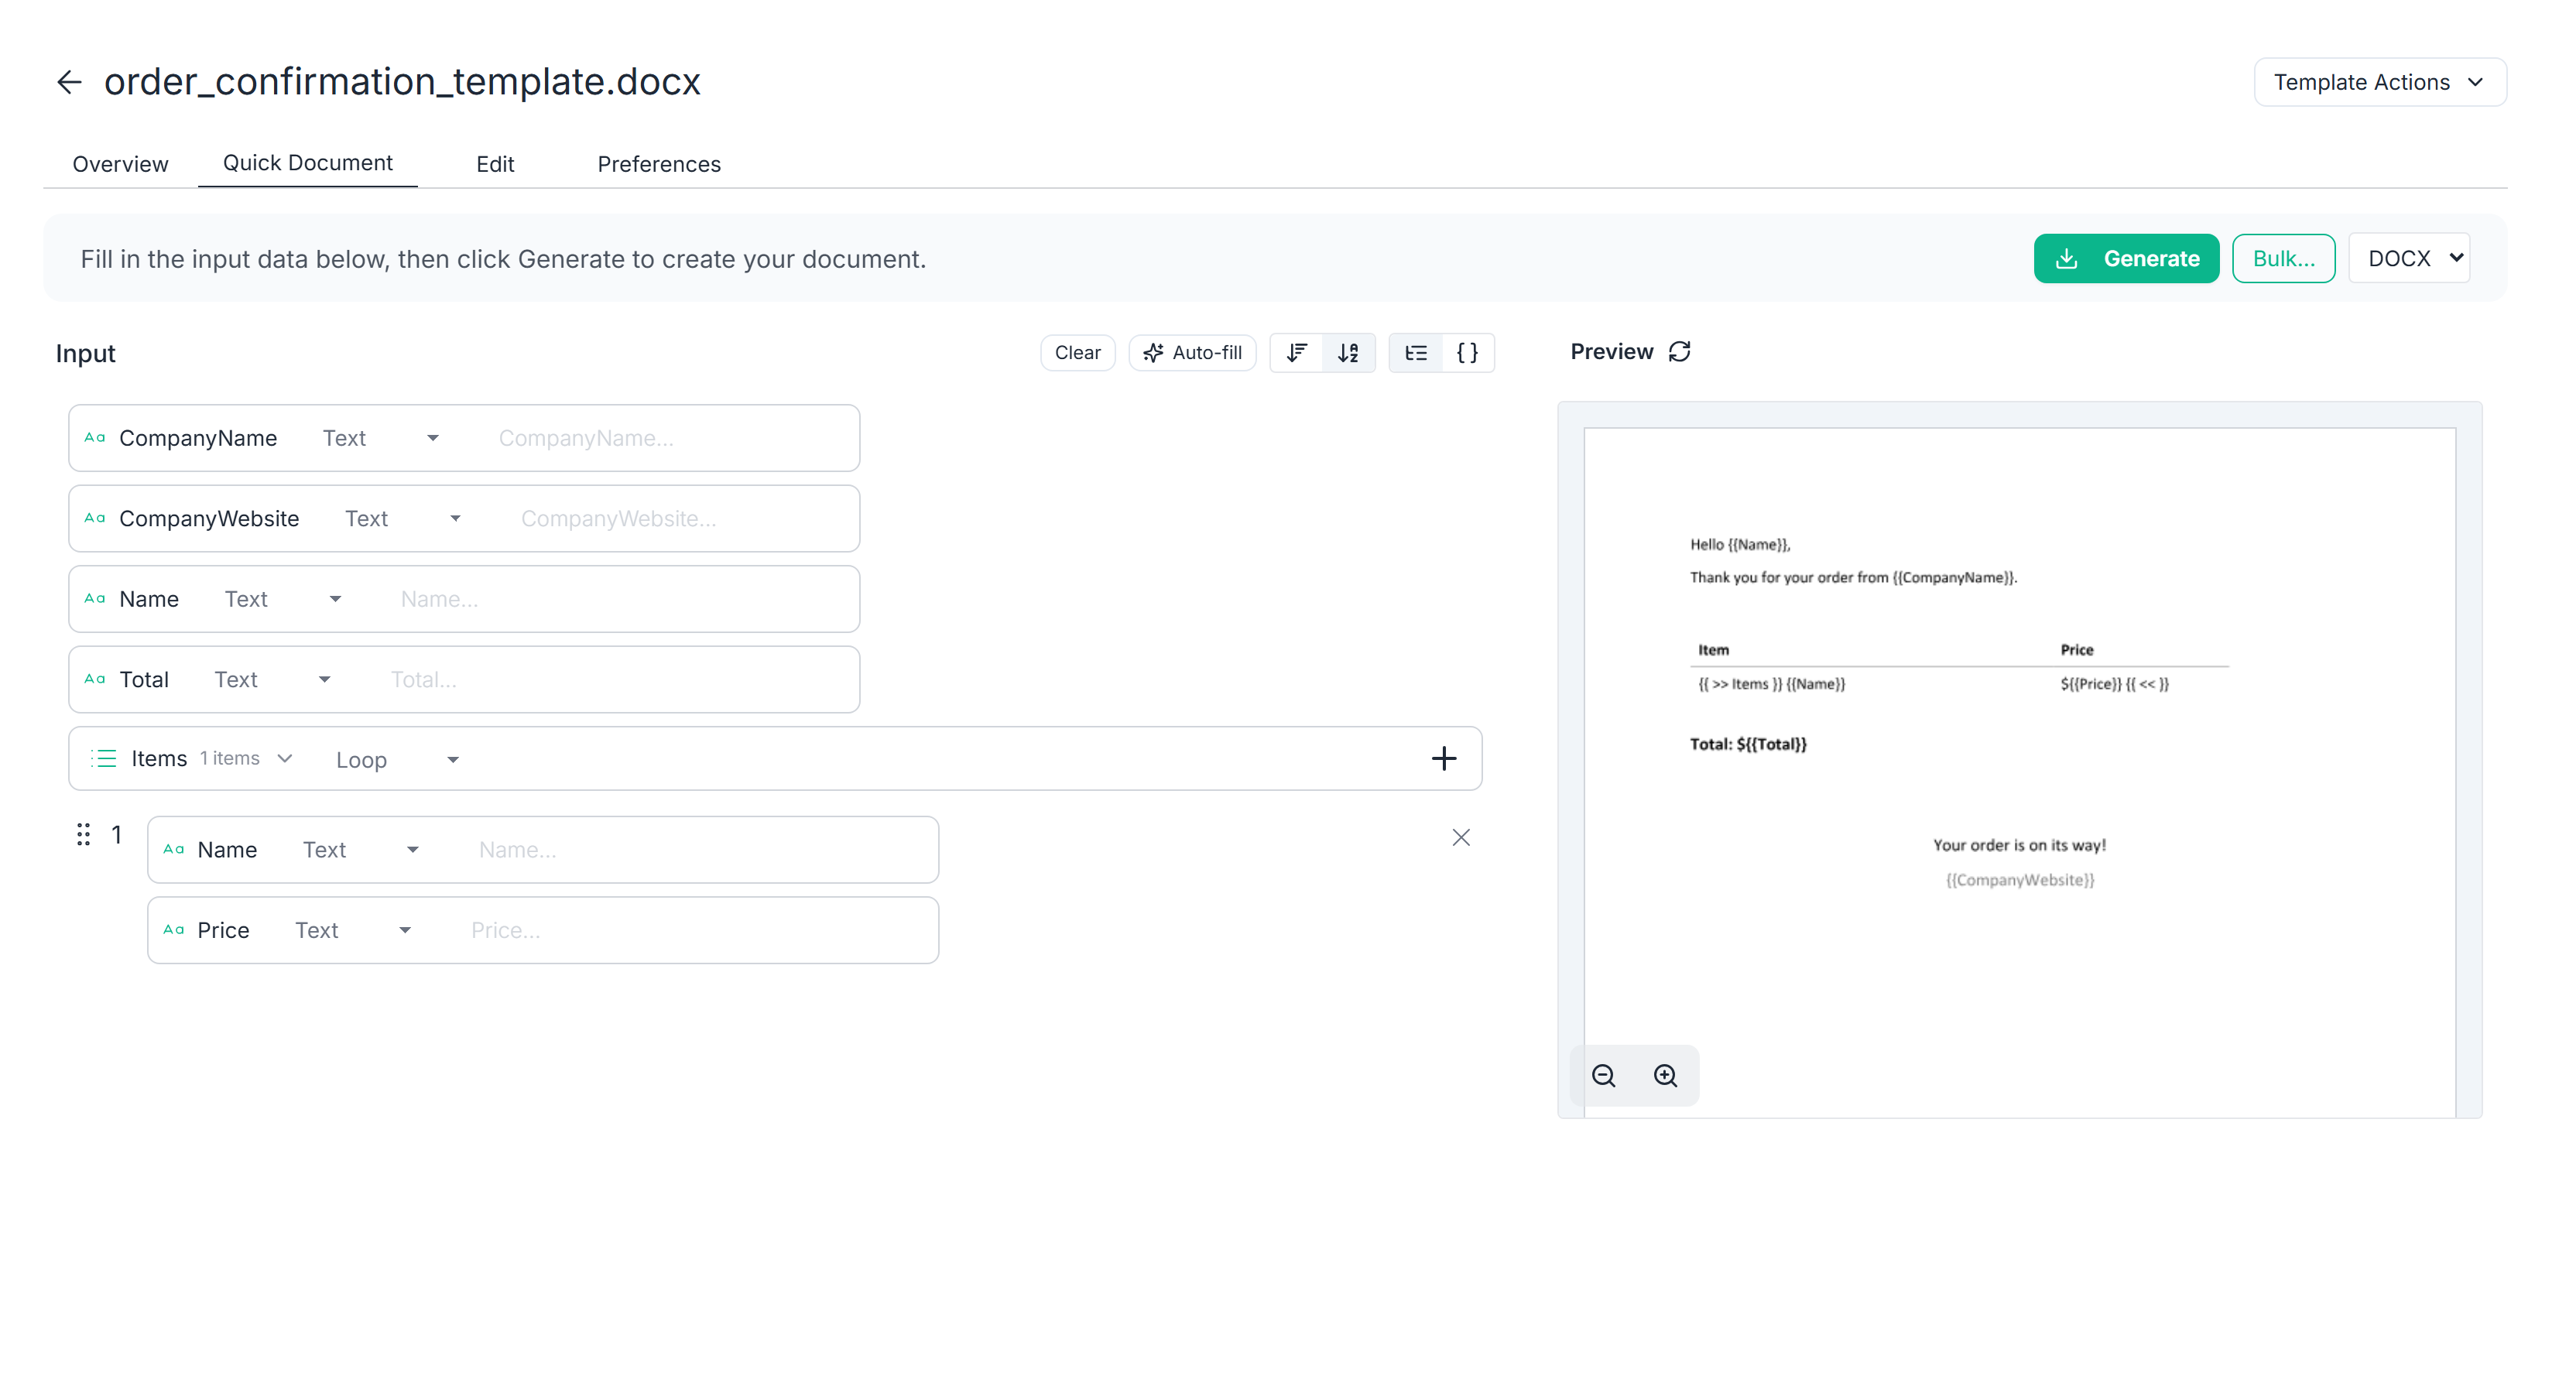
After a clean upload, the template opens in the Quick Document editor. The input panel is built from the tags TemplateDocs detected, and the refreshable preview shows where their values will appear.
Check that the expected fields are present and that the preview still looks right. If you wish to make changes, open the Edit tab to edit the template in your browser. See Edit a template for a walkthrough and more options.
4. Generate your first document
You are now ready to try the template:
- Fill in a value for each tag, or click Auto-fill to create sample values for you.
- Optionally, click the Preview button to see how the document will look with the values you filled in.
- Choose the output format - DOCX or PDF.
- Click Generate. The finished document is downloaded to your computer.
That's it - you have generated your first document. Every document you generate from now on uses the same template, so the layout stays consistent while the content changes.
Next Steps
- Learn how to convert an existing document to a template using AI.
- Customize and edit your template.
- Automate document generation with your first workflow.
- Repeat content, like table rows or list items, with loop tags.
