Trigger a workflow with a webhook
Send data from another app to generate personalized documents and deliver them automatically.
When the data you need already lives in another app, a webhook saves you from entering it again. That app sends the data to a unique URL in TemplateDocs, and your workflow takes it from there.
In this guide, we'll receive client details, generate a bookkeeping confirmation and email it to the client. The video uses Make to send the data, but any app or code that can send an HTTP request can do the same.
You will need a template before you begin. If you do not have one yet, you can download our service confirmation template which we use in this guide. It includes client and service details, plus an optional payroll section controlled by a condition. Alternatively, you can follow the steps in our guide to Create your first template or use AI to Convert an existing document.
1. Create a webhook-triggered workflow
- Open Workflows, then choose New Workflow > Create Workflow.
- Give it a name, such as "Bookkeeping Confirmation", and click Create.
- Click Choose a trigger and select Webhook.
- In the trigger settings, click Start Listening and copy the Webhook URL.
Keep TemplateDocs open while you send the sample in the next step. You don't need to publish this new workflow to capture sample data.
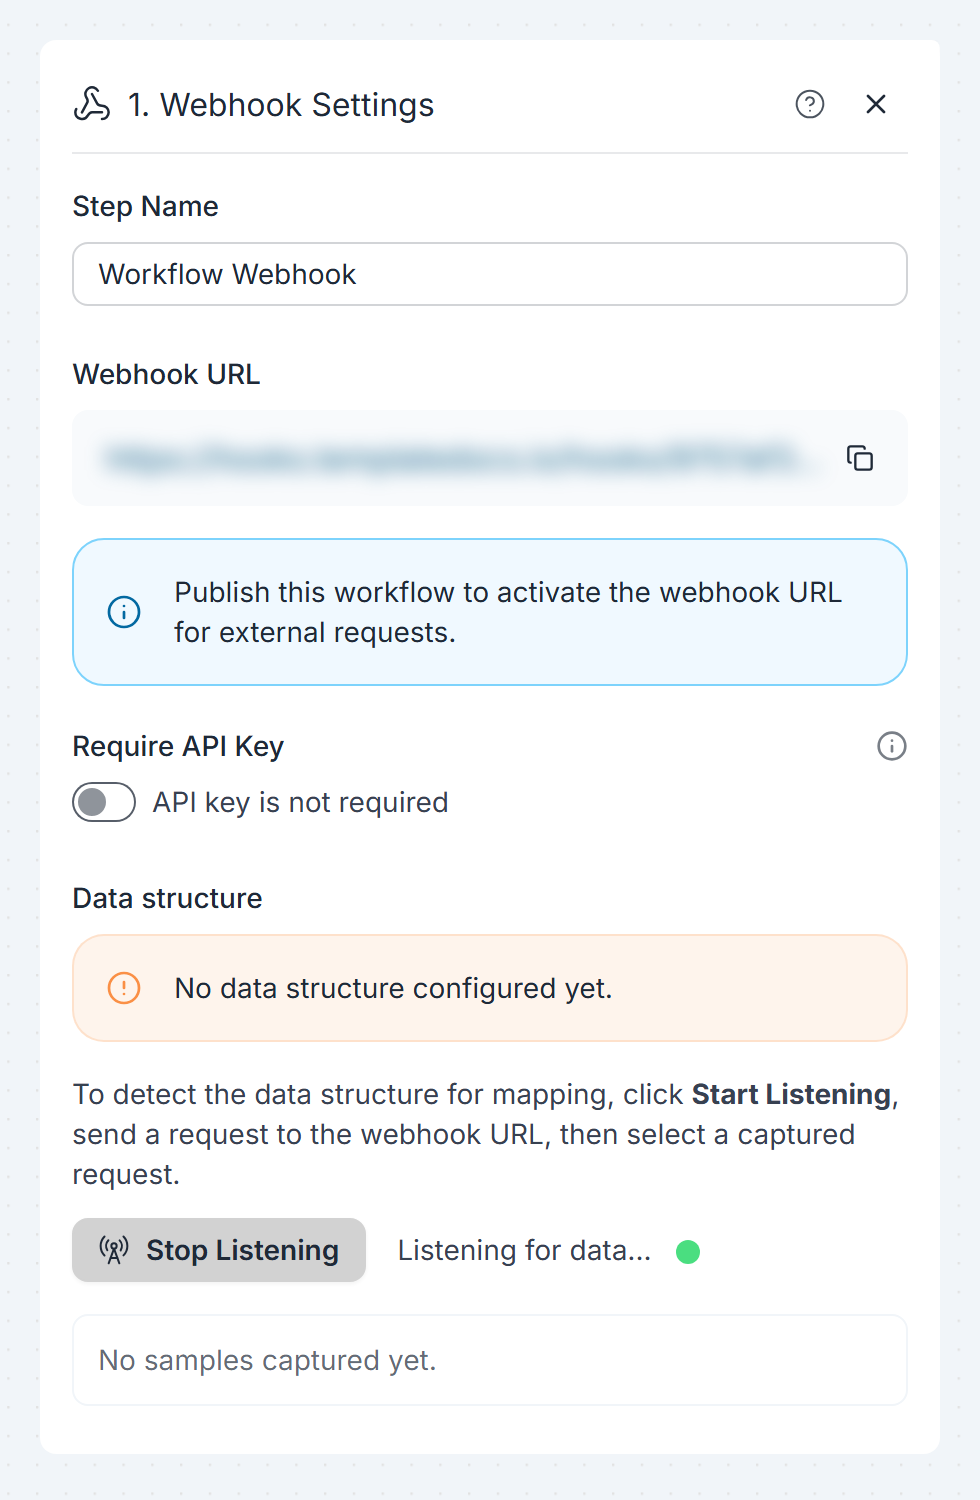
The video leaves Require API Key off for simplicity. Without it, anyone
who has the URL can run your published workflow, so keep the URL private.
For additional protection, enable Require API Key and send an
organization API key in the Authorization header as Bearer <api_key>.
See API Authentication for setup instructions.
2. Send a sample from your other app
In Make, add an HTTP module and choose Make a request. Configure it as follows:
| Setting | Value |
|---|---|
| URL | The webhook URL you copied from TemplateDocs |
| Authentication | No authentication, if Require API Key is off |
| Method | POST |
| Body content type | application/json |
| Body input method | JSON string |
If you enabled Require API Key, include the authorization header described above.
Use a representative sample containing the fields your workflow will need. Here is the bookkeeping example from the video, with a placeholder email address:
{
  "clientName": "Jordan Lee",
  "company": "Cedar & Pine Studio",
  "email": "jordan@example.com",
  "service": "Monthly bookkeeping",
  "fee": 450,
  "includePayroll": true,
  "startDate": "2026-09-01"
}
NOTE: Replace the email with an address you control before testing delivery.
Keep numbers and booleans unquoted: 450 is a number and true is a boolean.
Here, includePayroll will determine whether the payroll section appears.
Save the module and click Run once to send the sample.
3. Confirm the data structure
Back in TemplateDocs:
- Under Captured requests, select the request that just arrived.
- Review the detected fields and their types. Expand Sample if you want to inspect the original JSON.
- Click Use this Data Structure.
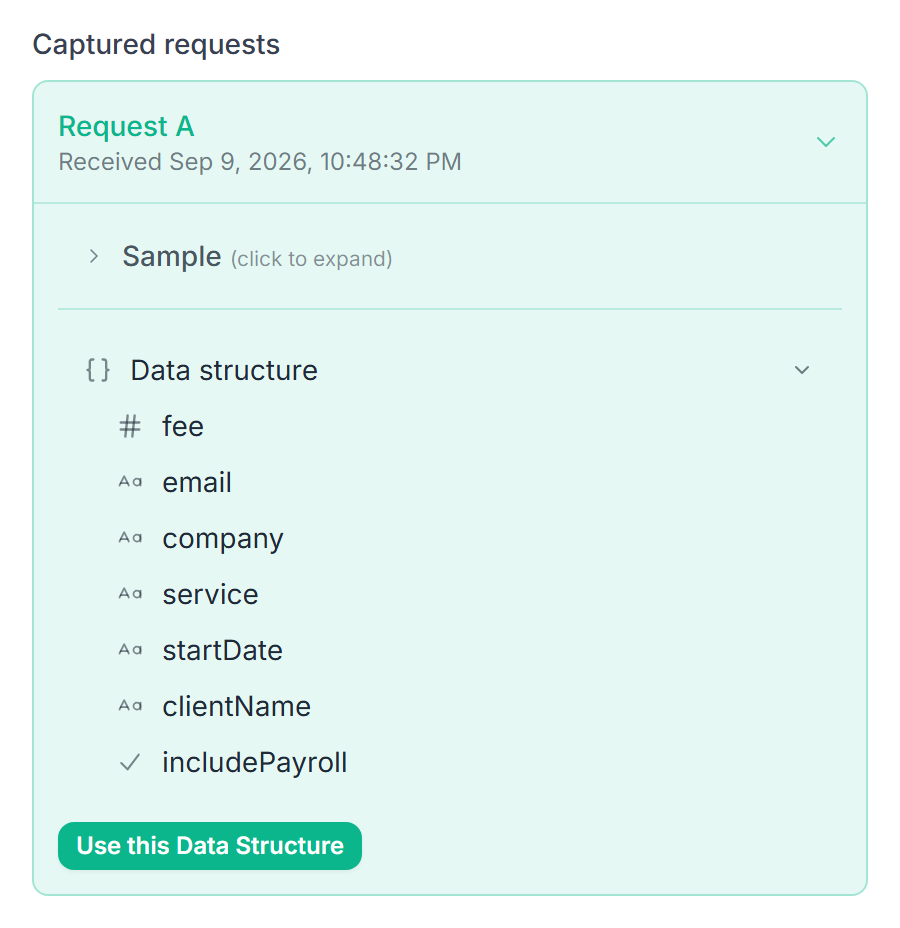
The fields are now available as workflow variables for later steps. Capturing the sample defines the structure, not fixed values: future requests supply their own client name, fee and other details.
If you add fields or change the shape of your data later, use Detect again to capture a new sample, then review your mappings. Note that on an already published workflow, sample requests will also start live runs.
4. Generate the document
- Add a Document step after the webhook trigger.
- Select your template and open Document Tag Mapping.
- Click Get suggestions, apply the suggestions and review each match. You can also drag webhook variables into the mapping fields or use the variable picker.
- Close the mapping dialog, adjust the output name if needed and choose PDF or DOCX.
For the template shown in the video, the mappings are:
| Template tag | Webhook field |
|---|---|
ClientName | clientName |
CompanyName | company |
Service | service |
StartDate | startDate |
MonthlyFee | fee |
IncludePayroll (condition) | includePayroll |
Your template may use different tag names. They don't have to match the JSON field names, as long as you map them to the right values.
With includePayroll mapped to the condition, true includes the payroll
section and false leaves it out. The email field doesn't need a document
tag: we'll use it for delivery instead.
5. Email the document
Add an Email step after the Document step:
- In the recipient field, use the variable picker to select the webhook's
emailfield. - Write your subject and message. Type
@to insert webhook values, such as the client's name or service, to personalize them. - Under Attachments, click Add Attachment and select the file created by the Document step.
The built-in email provider works without additional setup. See Email Delivery for provider options and limits.
6. Test and publish
Before going live, you can test the current draft directly in TemplateDocs:
- Click Test in the workflow designer.
- Review the sample JSON, use your own email address and start the test run.
- Open Run History to check that each step succeeded. Check your inbox and open the attachment to review the generated document.
- If you use the payroll condition, you can try both
trueandfalseand see how the section appears only when it should.
Test runs execute the workflow's steps, including sending emails, and consume credits like live runs. Use sample data and a recipient you control.
When you're happy with the result, click Publish. Return to Make and click Run once again to check the full connection. This time, the external request runs the published workflow and delivers the document.
7. Use your workflow
To automate future requests, replace the fixed sample values in your sending app with data from the real event, such as a new client in your CRM. Each request then generates a document using that client's details.
Changes you make later are saved as a draft and are only visible to you. The webhook URL continues to use the published version until you click Publish again.
Next Steps
- Read the full Webhooks documentation.
- Learn how to create a template.
- See how to generate documents in bulk from spreadsheet data.
