Edit a template
Customize your template's content, layout and style using Word or our online editor.
As your template evolves, you can update it in whichever way works best for you. Make changes directly in the online editor, or edit the document in Word and upload the updated version - whether you're renaming tags, adding placeholders, making sections conditional, or changing the document itself.
Using the online editor
- Open the Templates page and click the template you want to change.
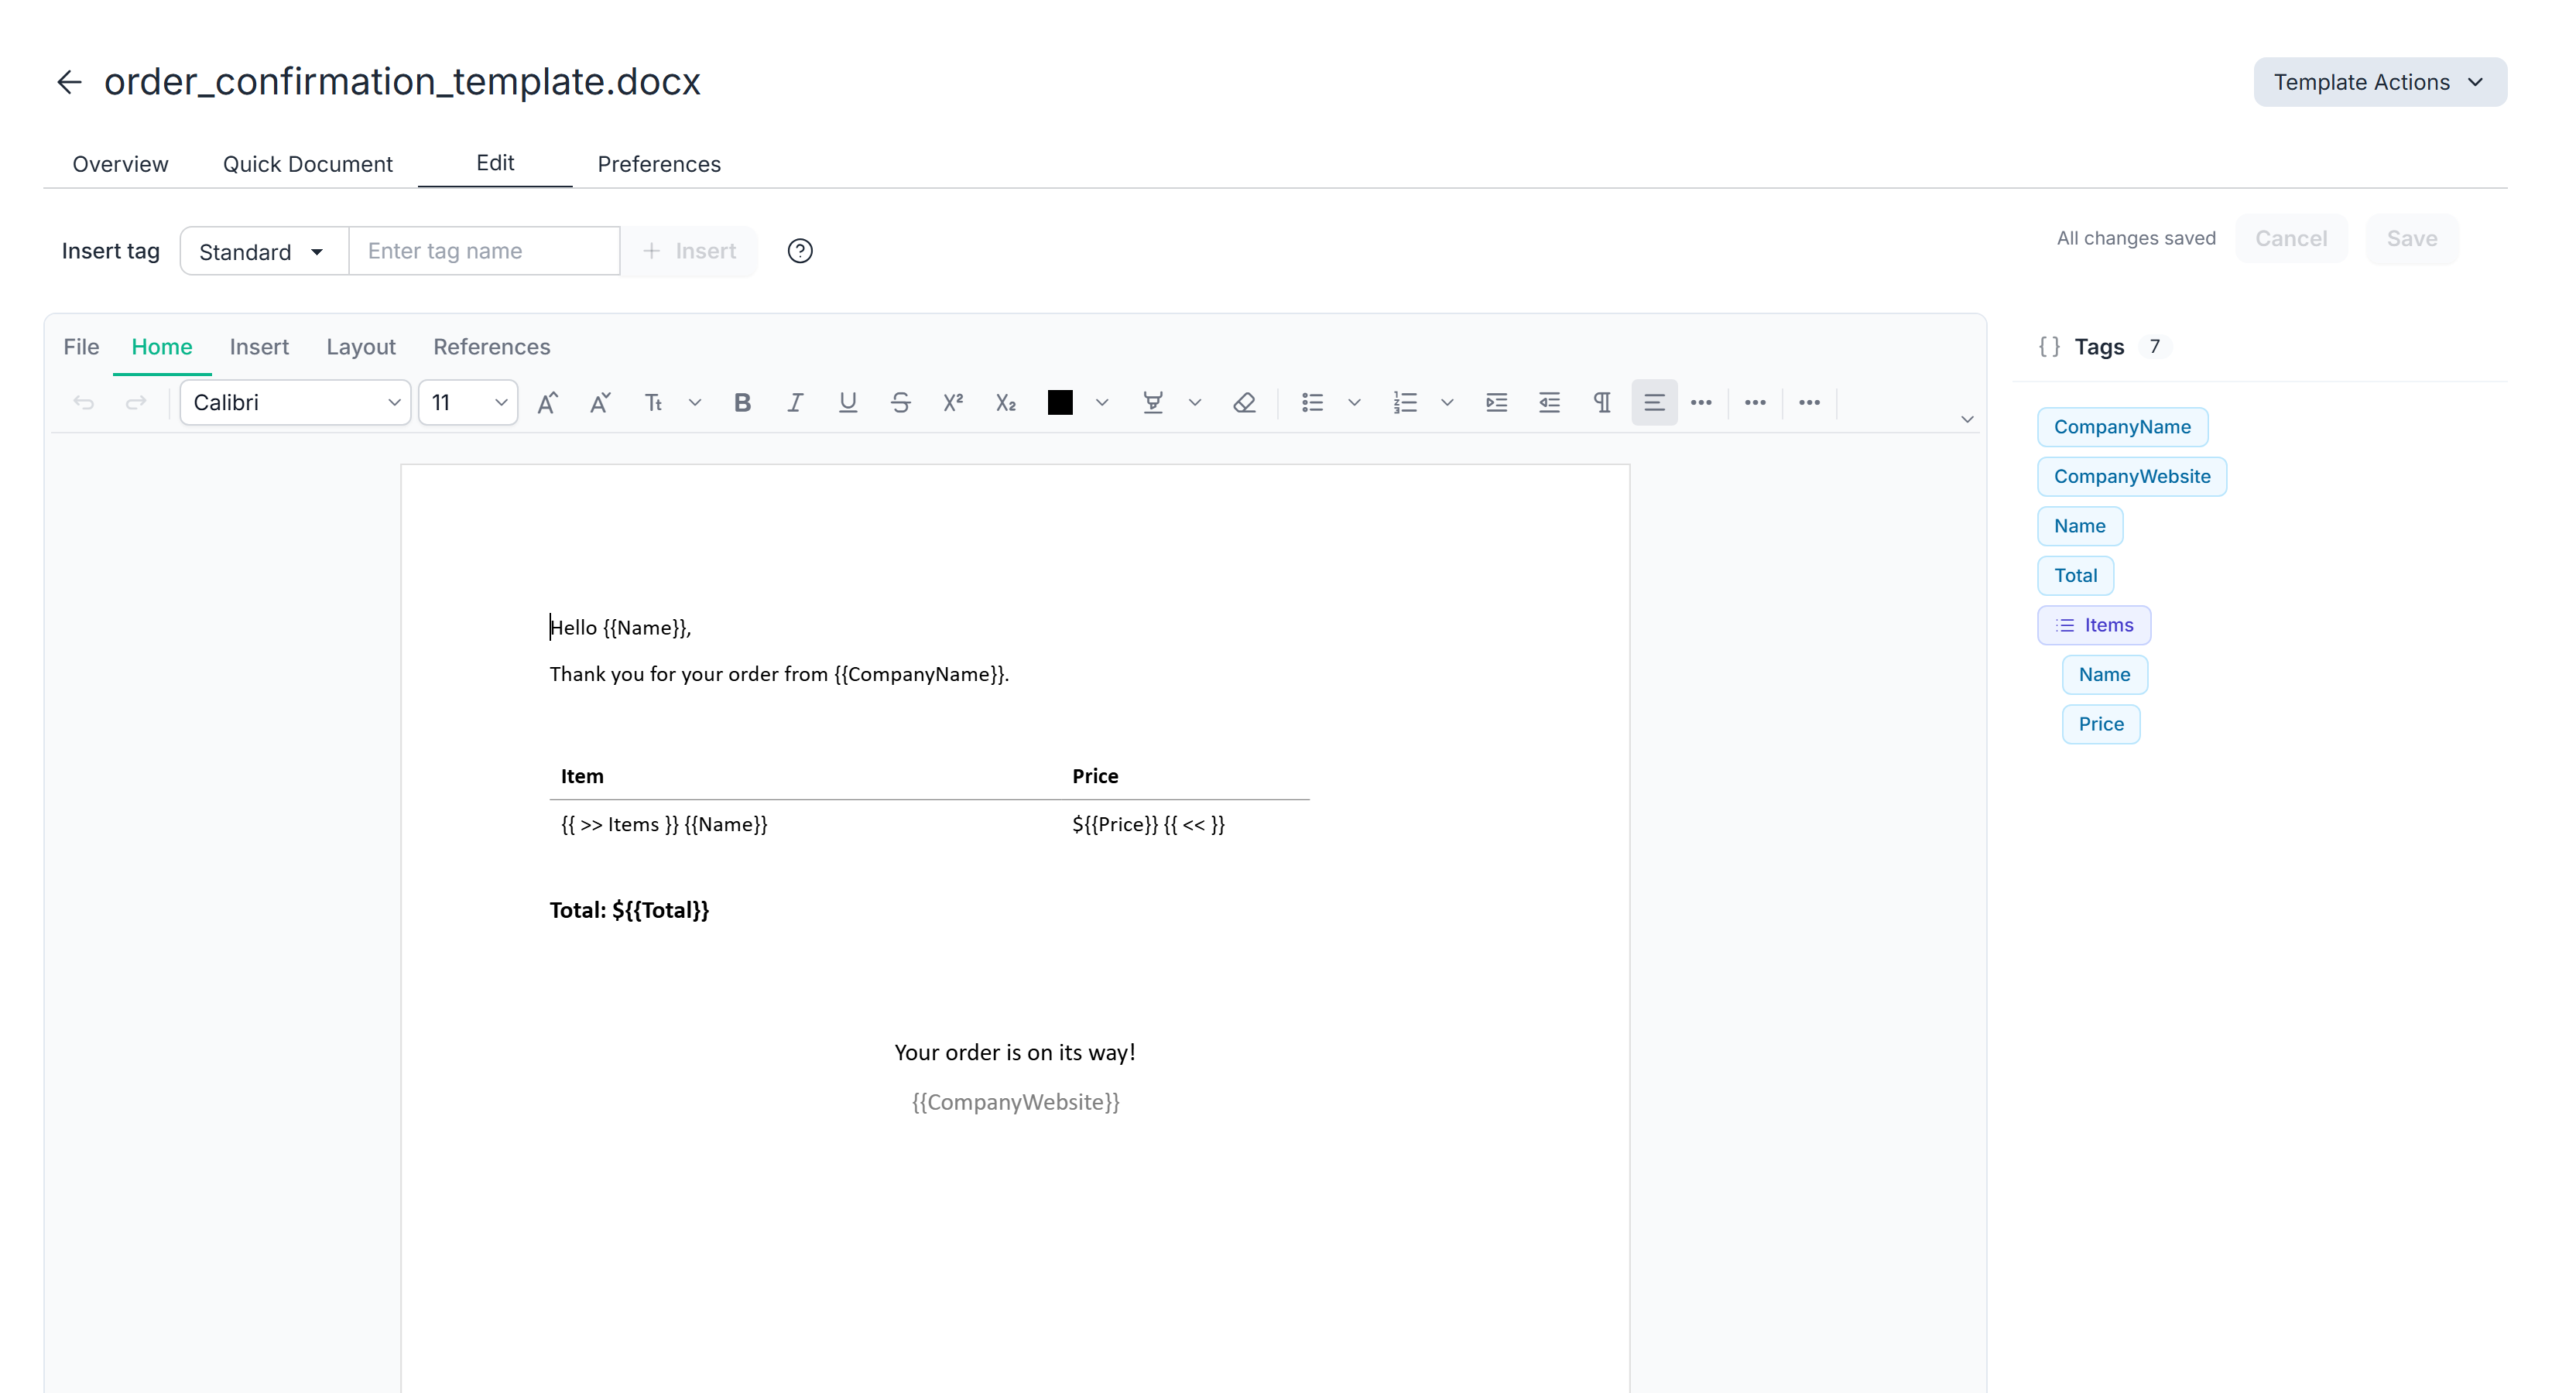
- Switch to the Edit tab. The document opens in an online Word editor.
You can edit text and formatting directly, just like in Word.
Insert a tag
Tags can be typed by hand, but the Insert tag bar at the top of the editor is an convenient way to insert tags quickly.
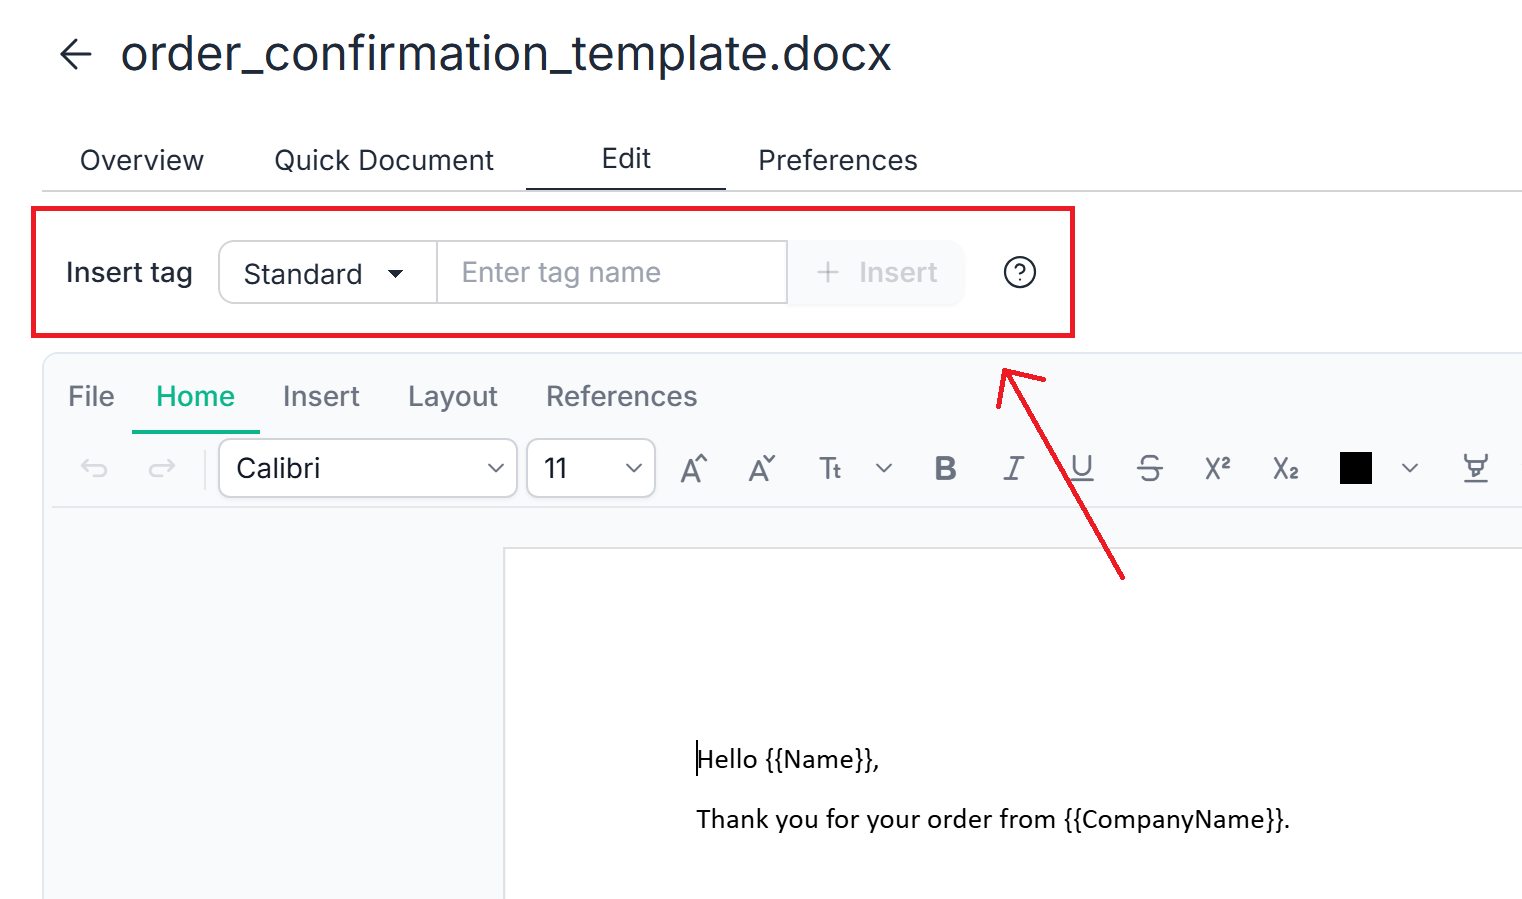
- Place the cursor where the tag should go.
- Choose the tag type:
- Standard - replaced with a single value, such as
{{CustomerName}}. - Loop - repeats the content between
{{ >> Items }}and{{ << }}once per item. Use it for table rows and lists. - Condition - shows the content between the opening and closing tags only when the value is true.
- Standard - replaced with a single value, such as
- Type the tag name and click Insert (or press Enter).
For a loop or condition, the editor inserts an opening and closing marker with
placeholder content between them. Replace that content with what should repeat
or appear. A loop normally contains standard tags for the values on each item.
For example, an Items loop may contain {{Name}} and {{Price}}.
If the name is not valid, the editor tells you what to fix. Valid names start
with an English letter and contain only English letters, numbers and
underscores - for example TagName, tag_name or Tag_Name.
Rename or remove a tag
Select the tag text in the document and edit it like any other text. A tag is
just text in double curly braces, so renaming {{Name}} to {{FullName}} is a
matter of typing. Make sure to keep both the opening {{ and the closing }}.
Save your changes
The editor tracks unsaved changes. Click Save to store the new version of the template, or Cancel to discard the edits and return to the last saved version.
After saving, the tag list on the Overview tab updates and the new tags appear in the Quick Document form and in your workflows.
If a workflow uses this template, check its document step after adding or renaming tags - new tags need a value, and renamed tags need to be mapped again.
Editing in Word
If you prefer to work in Word, you can download the template, make your changes, and re-upload it when you're done:
- In the template page, choose Template Actions > Download.
- Make your changes in Word.
- Choose Template Actions > Re-upload and select the updated file.
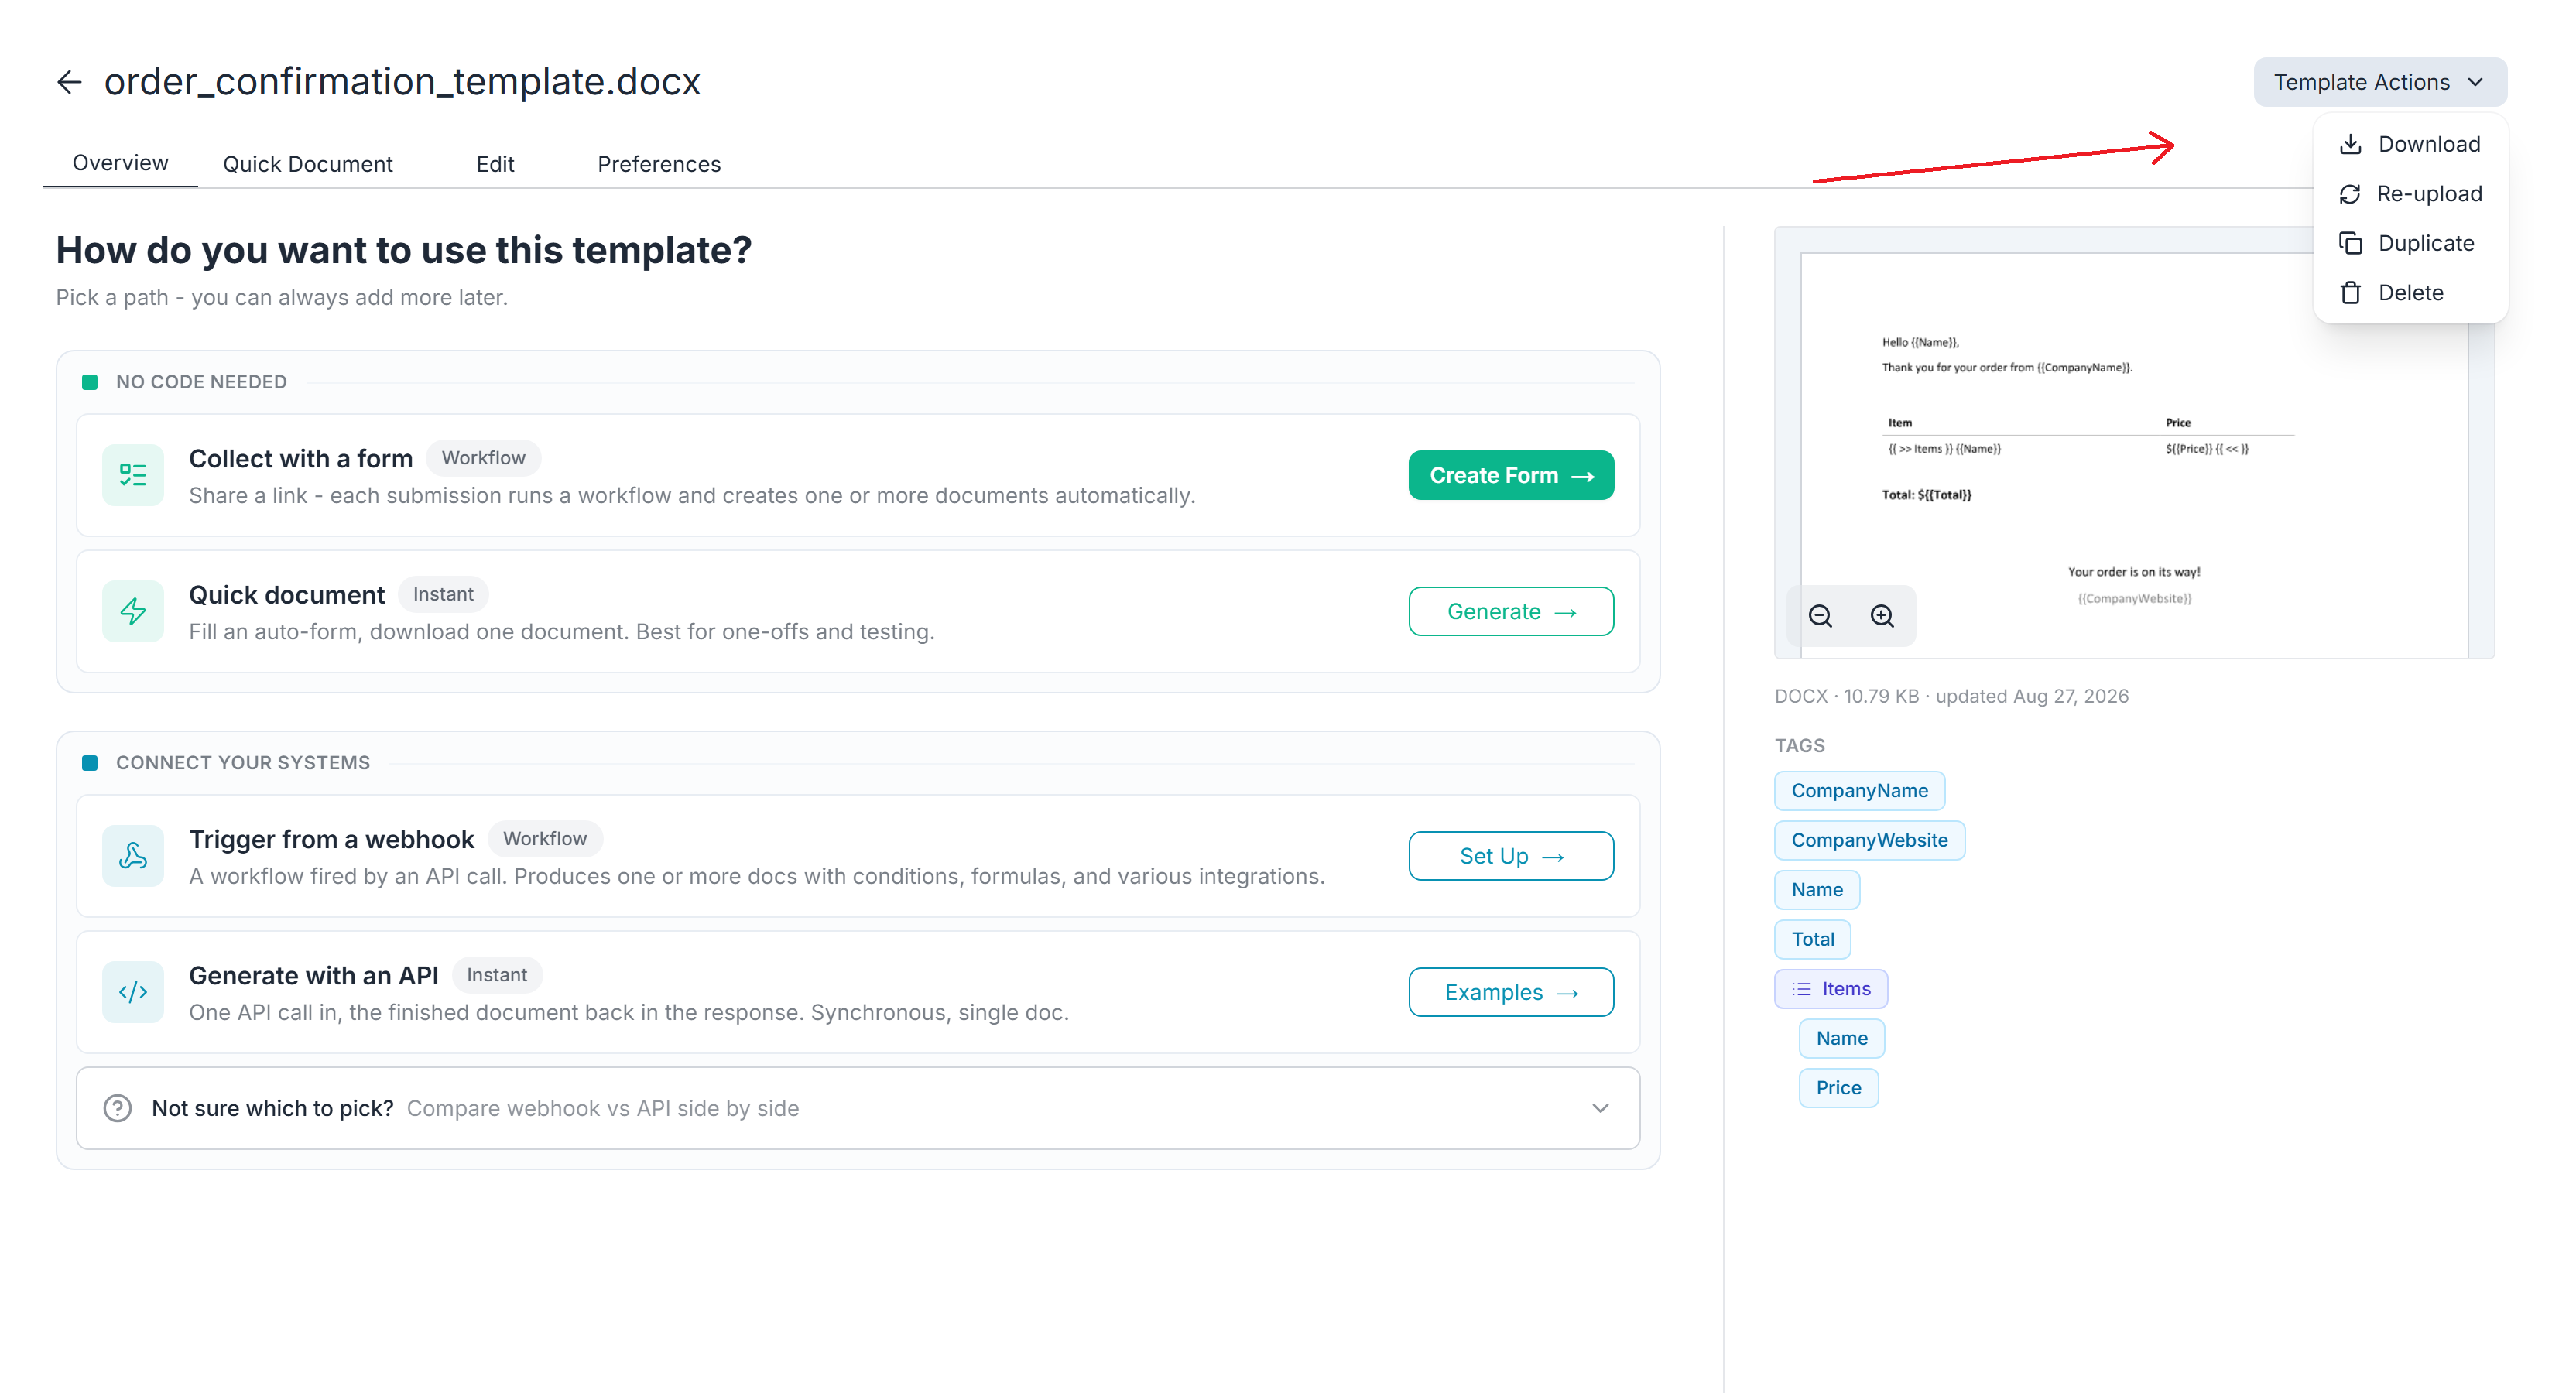
Re-uploading replaces the file without creating a new template, so workflows and API integrations continue to reference it. If you added or renamed tags, update the workflow mappings or API input data that supplies their values.
Test your changes
- Open the Quick Document tab, enter tag values or click Auto-fill.
- Click the Preview button to see a preview directly in the browser.
- Click the Generate button to create and download a full document.
- Review the finished document to make sure everything looks the way you want.
Next Steps
- Learn how to convert an existing document to a template using AI.
- Explore additional template features like loops, links, QR codes and images.
- Automate document generation with your first workflow.
