How to generate certificates in bulk
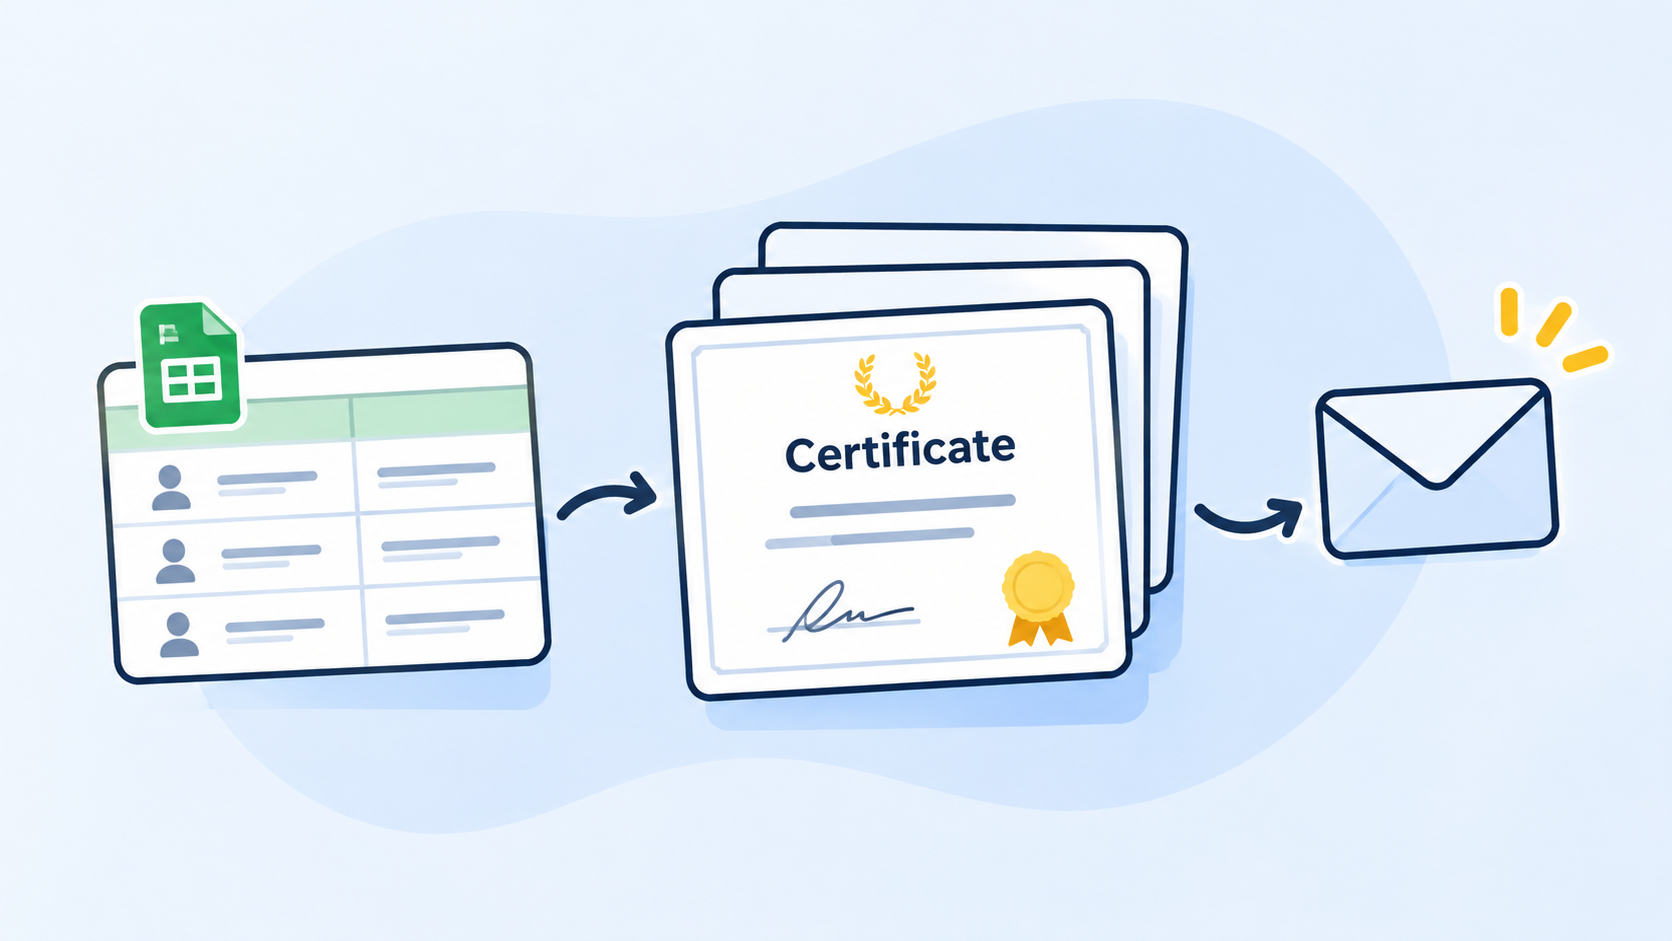
Issue personalized certificates in bulk: turn a spreadsheet of attendees or students into PDF certificates and email each one automatically.
To issue certificates in bulk, design one certificate in Microsoft Word with
placeholders like {{ Name }} and {{ Course }}, list your recipients in a
spreadsheet with one row per person, and use certificate software to generate a
personalized PDF for every row. With TemplateDocs you can upload the
spreadsheet as a CSV file and download a zip file of certificates, email each
certificate to its recipient, or create a certificate automatically whenever a
row is added to Google Sheets, Airtable or your CRM.
The process is exactly the same whether you're issuing certificates for conference and webinar attendees, workshop participants, course completers, award winners, or more. Follow the step by step guide below to get started.
In this article:
- What to look for in bulk certificate software
- Step 1: Turn your certificate into a template
- Step 2: Prepare the recipient list
- Step 3: Choose how to generate
- Option A: Download all certificates as a zip file
- Option B: Email each certificate from a CSV file
- Option C: Create a certificate for every new row
- Frequently asked questions
What to look for in bulk certificate software
Most certificate tools can fill in a name. For issuing hundreds of certificates after an event or a course, check that the software can:
- Generate from a spreadsheet. One certificate per row, without copying names by hand or running a mail merge.
- Connect to live data sources. Start from Google Sheets, Airtable, your CRM, a registration form or your course platform, not only from file uploads.
- Keep your own design. Use your existing artwork, fonts and logos instead of a limited set of built-in templates.
- Deliver each certificate. Email every recipient their own PDF, or upload to a cloud storage folder, not one big file you have to split and send yourself.
- Add QR codes. Link to certificate verification pages, course materials, or other online resources.
- Scale with your volume. Pricing should grow with the number of certificates you issue, not with seats or events.
TemplateDocs covers all of these. The steps below show how.
Step 1: Turn your certificate into a template
Start from your own certificate design in Word, or download the sample template below. Any layout Word can produce works: landscape pages, borders, background artwork, logos, signatures and script fonts. Replace every detail that changes per person with a tag in double curly braces:
| On the certificate | Tag |
|---|---|
| Recipient name | {{ Name }} |
| Course or event name | {{ Course }} |
| Completion or attendance date | {{ CompletionDate }} |
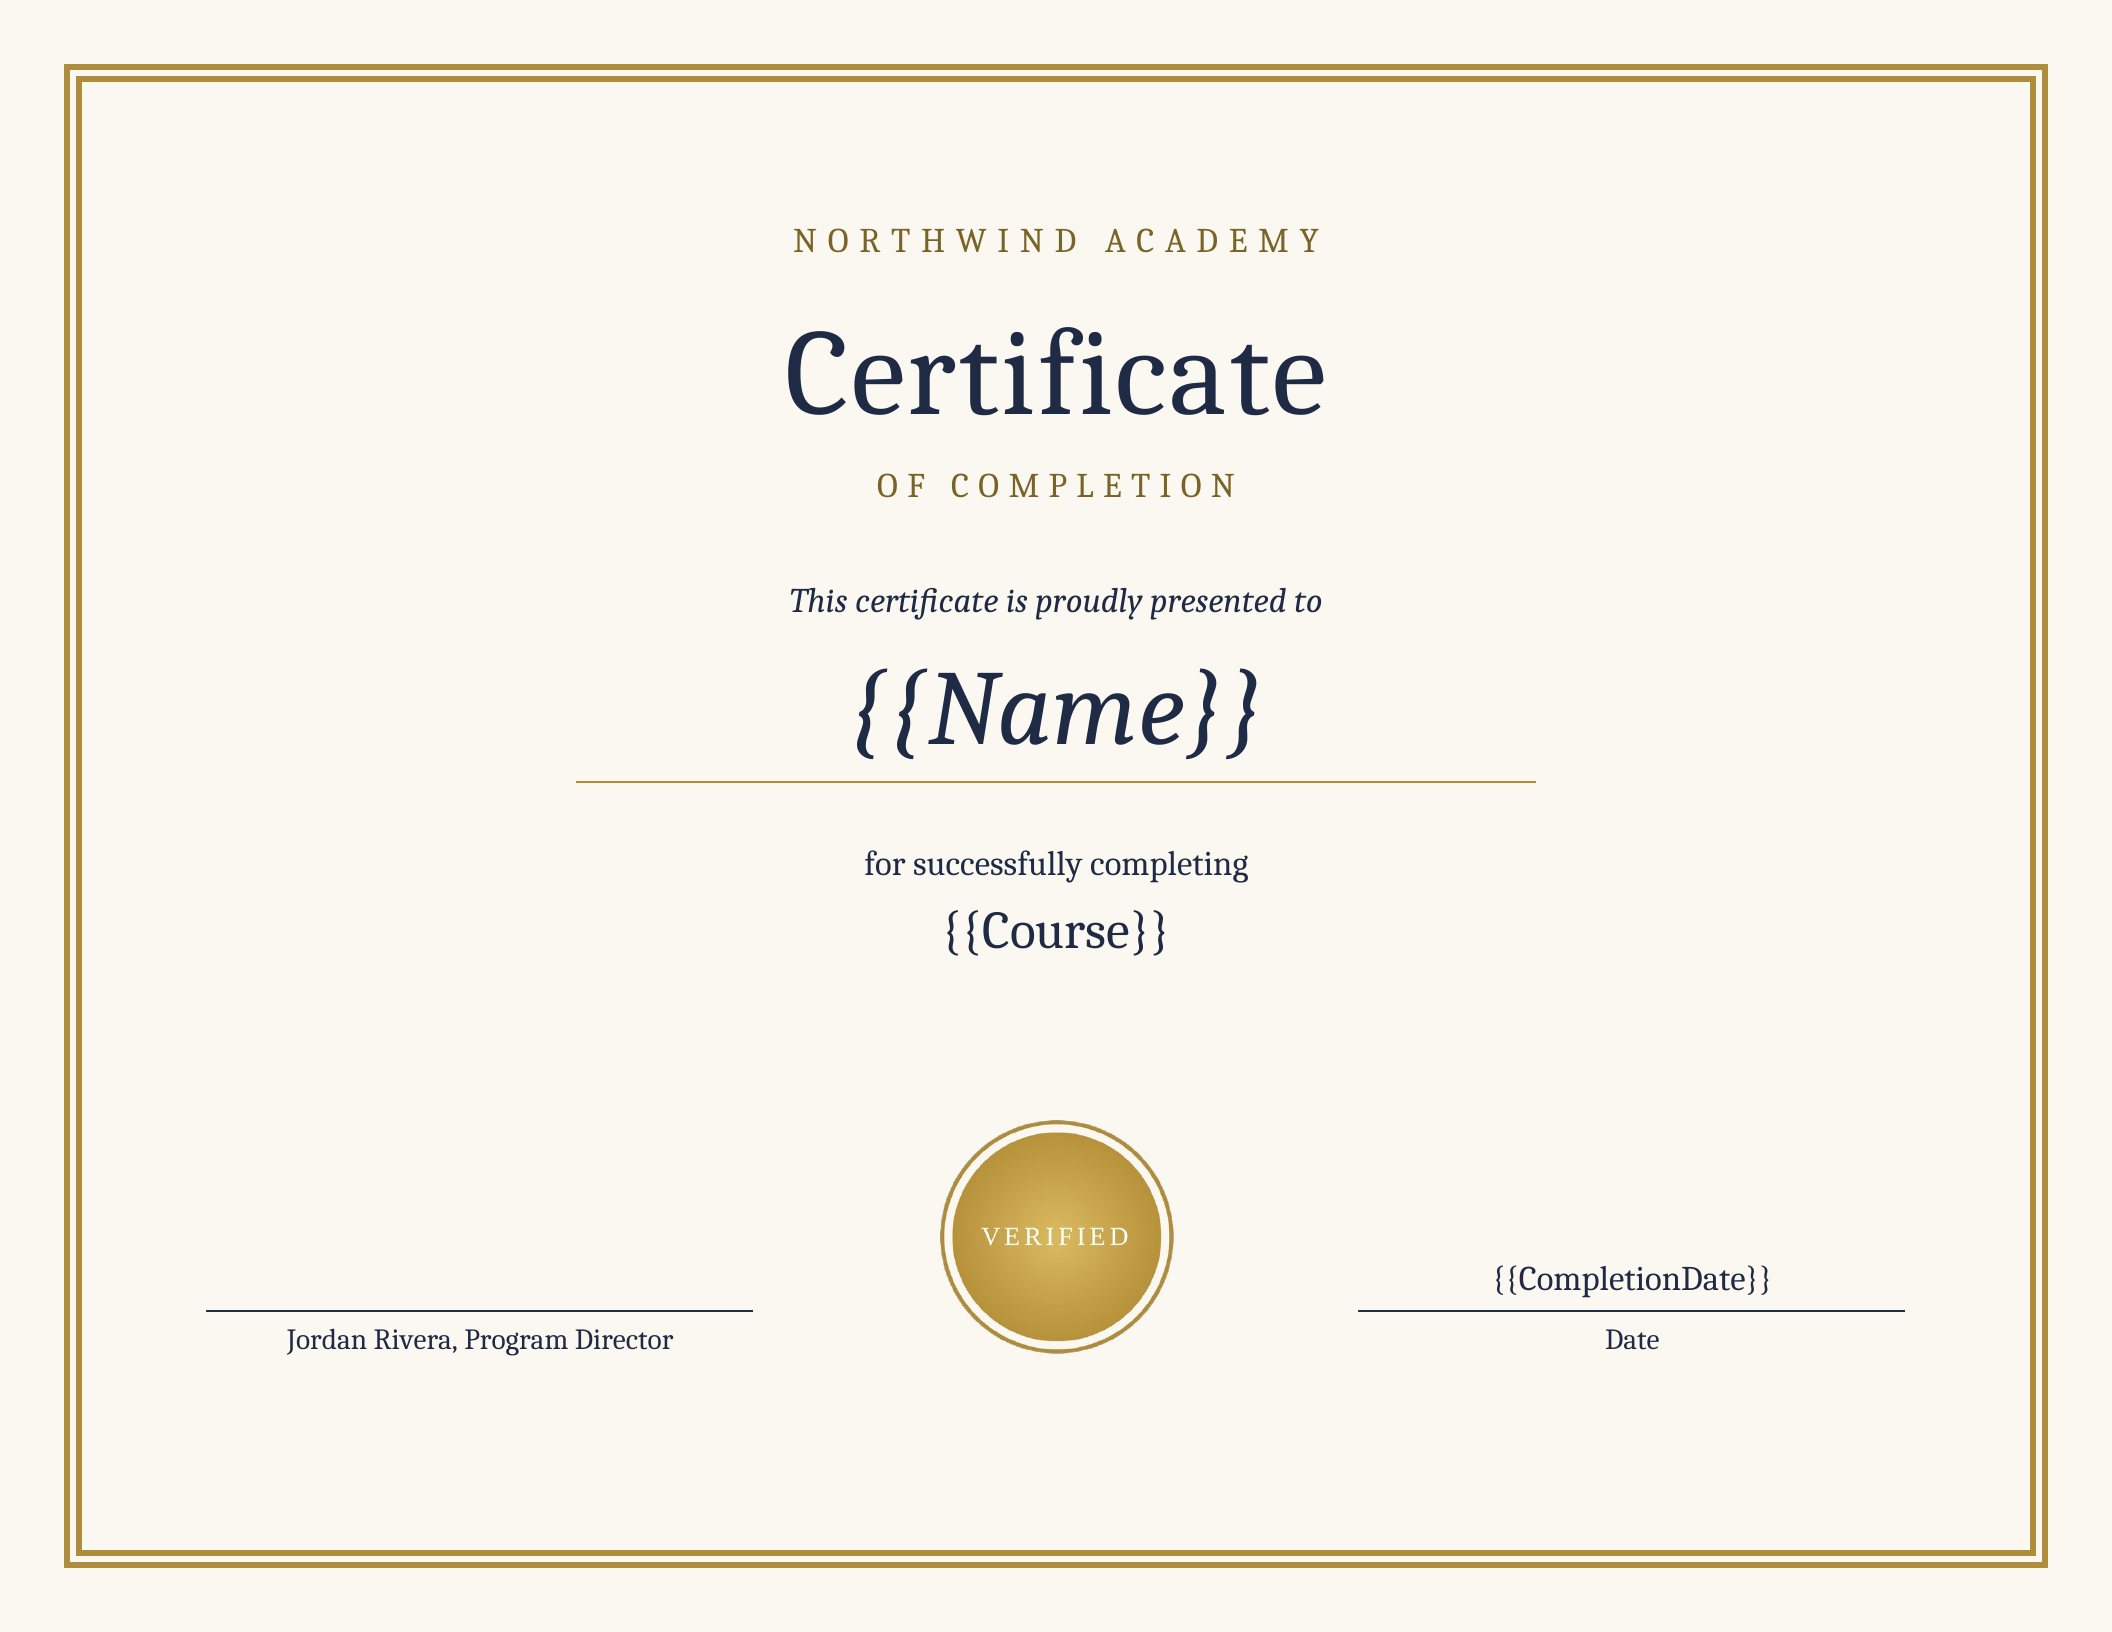
Click the certificate to download it as a Word template.
Format each tag the way the value should look. The font size and style are preserved. Then upload the document as a new template in TemplateDocs.
Tag names are case-sensitive and can't contain spaces. See Template Tags for the full rules, or let AI convert your existing certificate into a template.
Step 2: Prepare the recipient list
Depending on how you intend to generate the certificates, prepare the recipient list in one of two ways:
-
If you plan to use Option A: download all certificates as a zip file or Option B: email each certificate from a CSV file, create a CSV file as described below.
-
If you plan to use Option C: create a certificate for every new row in a Google Sheets, an Airtable base or your CRM, simply make sure that the data source has a column for each tag, and move on to the next step.
Creating a CSV file
List one recipient per row, with the column names in the first row. Name the columns after your tags, so they're matched automatically.
Add an Email column if you plan to email the certificates.
| Name | Course | CompletionDate | |
|---|---|---|---|
| Alex Lee | alex@example.com | CPR Basics | November 4, 2026 |
| Sam Taylor | sam@example.com | CPR Basics | November 4, 2026 |
A few tips:
- Write values the way they should look. Text is inserted as-is, so type
dates like
November 4, 2026. - Start from a sample. Download this sample list (.csv), or use the ready-made CSV template that the bulk dialogs in TemplateDocs offer.
- If your data lives in Excel, use File > Save As > CSV to create a CSV file.
- If your data lives in Google Sheets, use File > Download > Comma-separated values.
Step 3: Choose how to generate
There are three ways to generate certificates in bulk. Pick the one that matches your use case best.
- Option A: Download all certificates as a zip file
- Option B: Email each certificate from a CSV file
- Option C: Create a certificate for every new row
| Zip file | Email from CSV | Every new row | |
|---|---|---|---|
| Best for | Certificates you'll print or send yourself | Emailing a whole list after an event | Integrating with your existing platform |
| Output | One zip file with all certificates | One file per row, emailed and saved to your storage | One file per new row, emailed and saved to your storage |
| Rows at once * | Up to 25 | Up to 100 | No limit |
Option A: Download all certificates as a zip file
- Open the certificate template and switch to the Quick Document tab.
- Choose PDF, then click Bulk...
- Upload your CSV file.
- Check that each column is mapped to the right tag. Columns named like a tag are matched automatically.
- Check the preview, then click Generate N Documents.
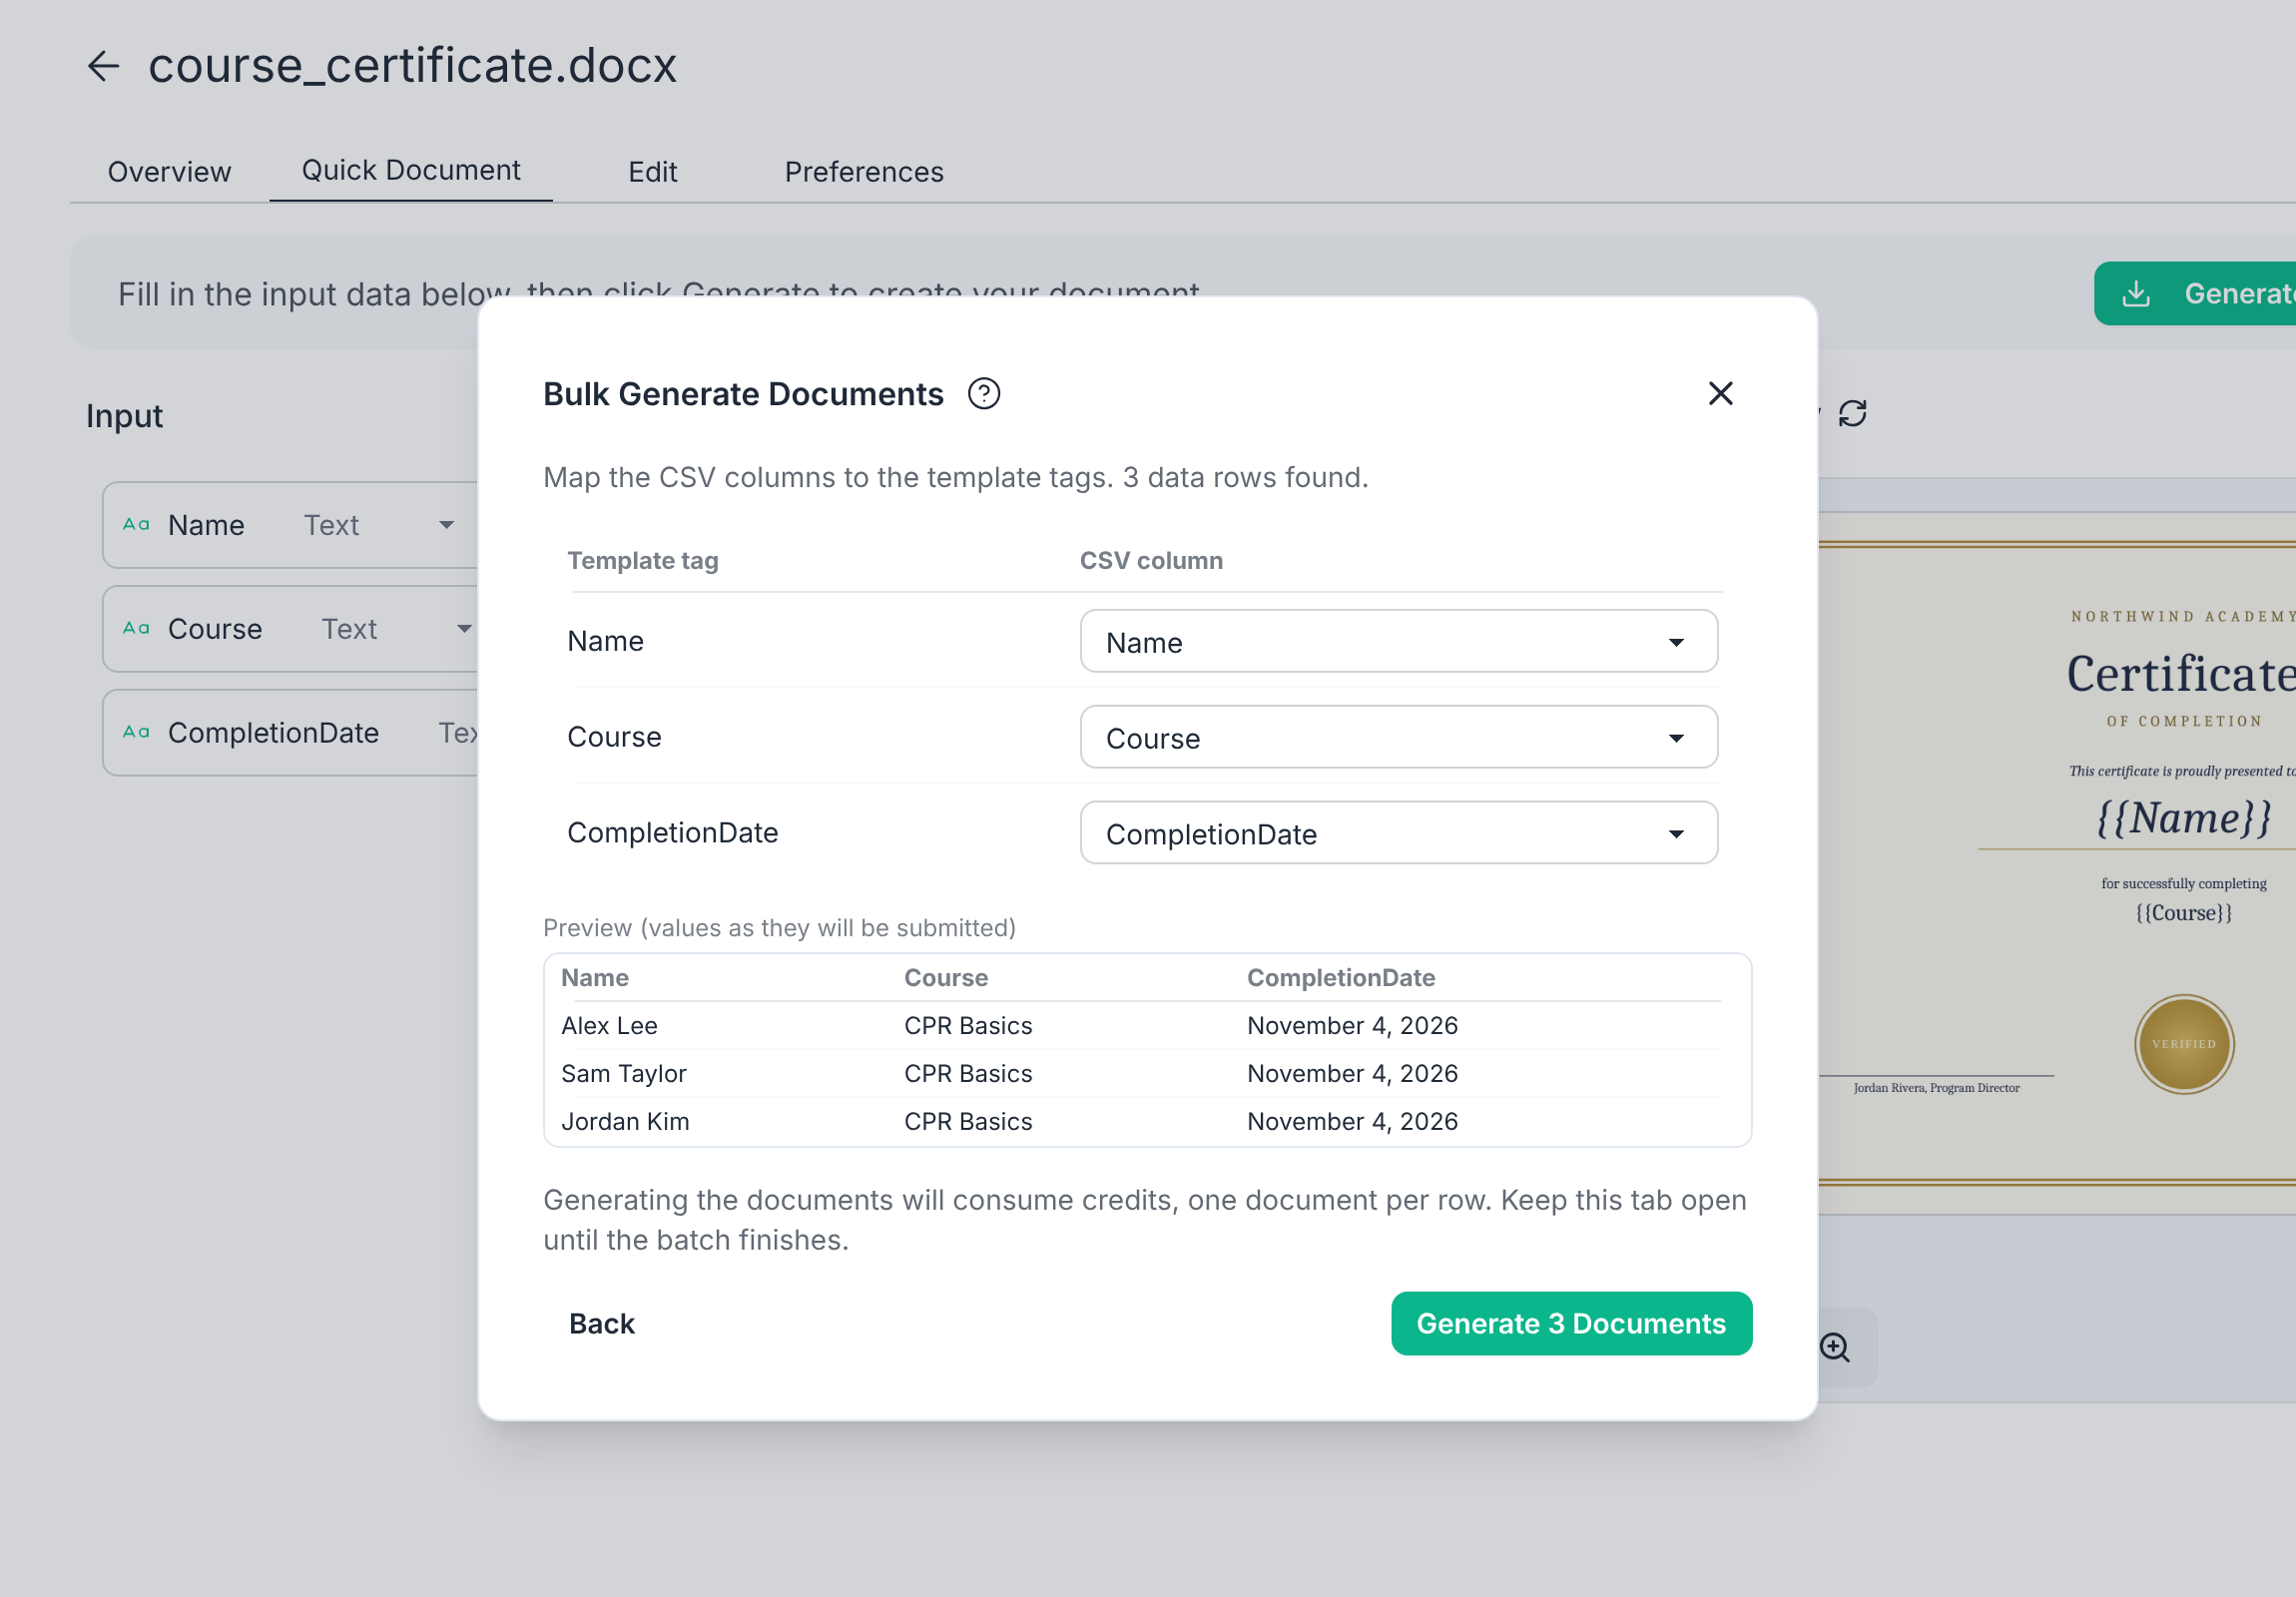
Keep the browser tab open until the batch finishes. The zip file with one certificate per row downloads automatically.
Option B: Email each certificate from a CSV file
A workflow generates each certificate and delivers it in the same run. Set it up once and reuse it for every course or event.
1. Create the workflow from the template
- Open the certificate template. On the Overview tab, choose Collect with a form.
- Choose Simple form and click Continue.
- Keep Send an email on, name the workflow, and click Create workflow.
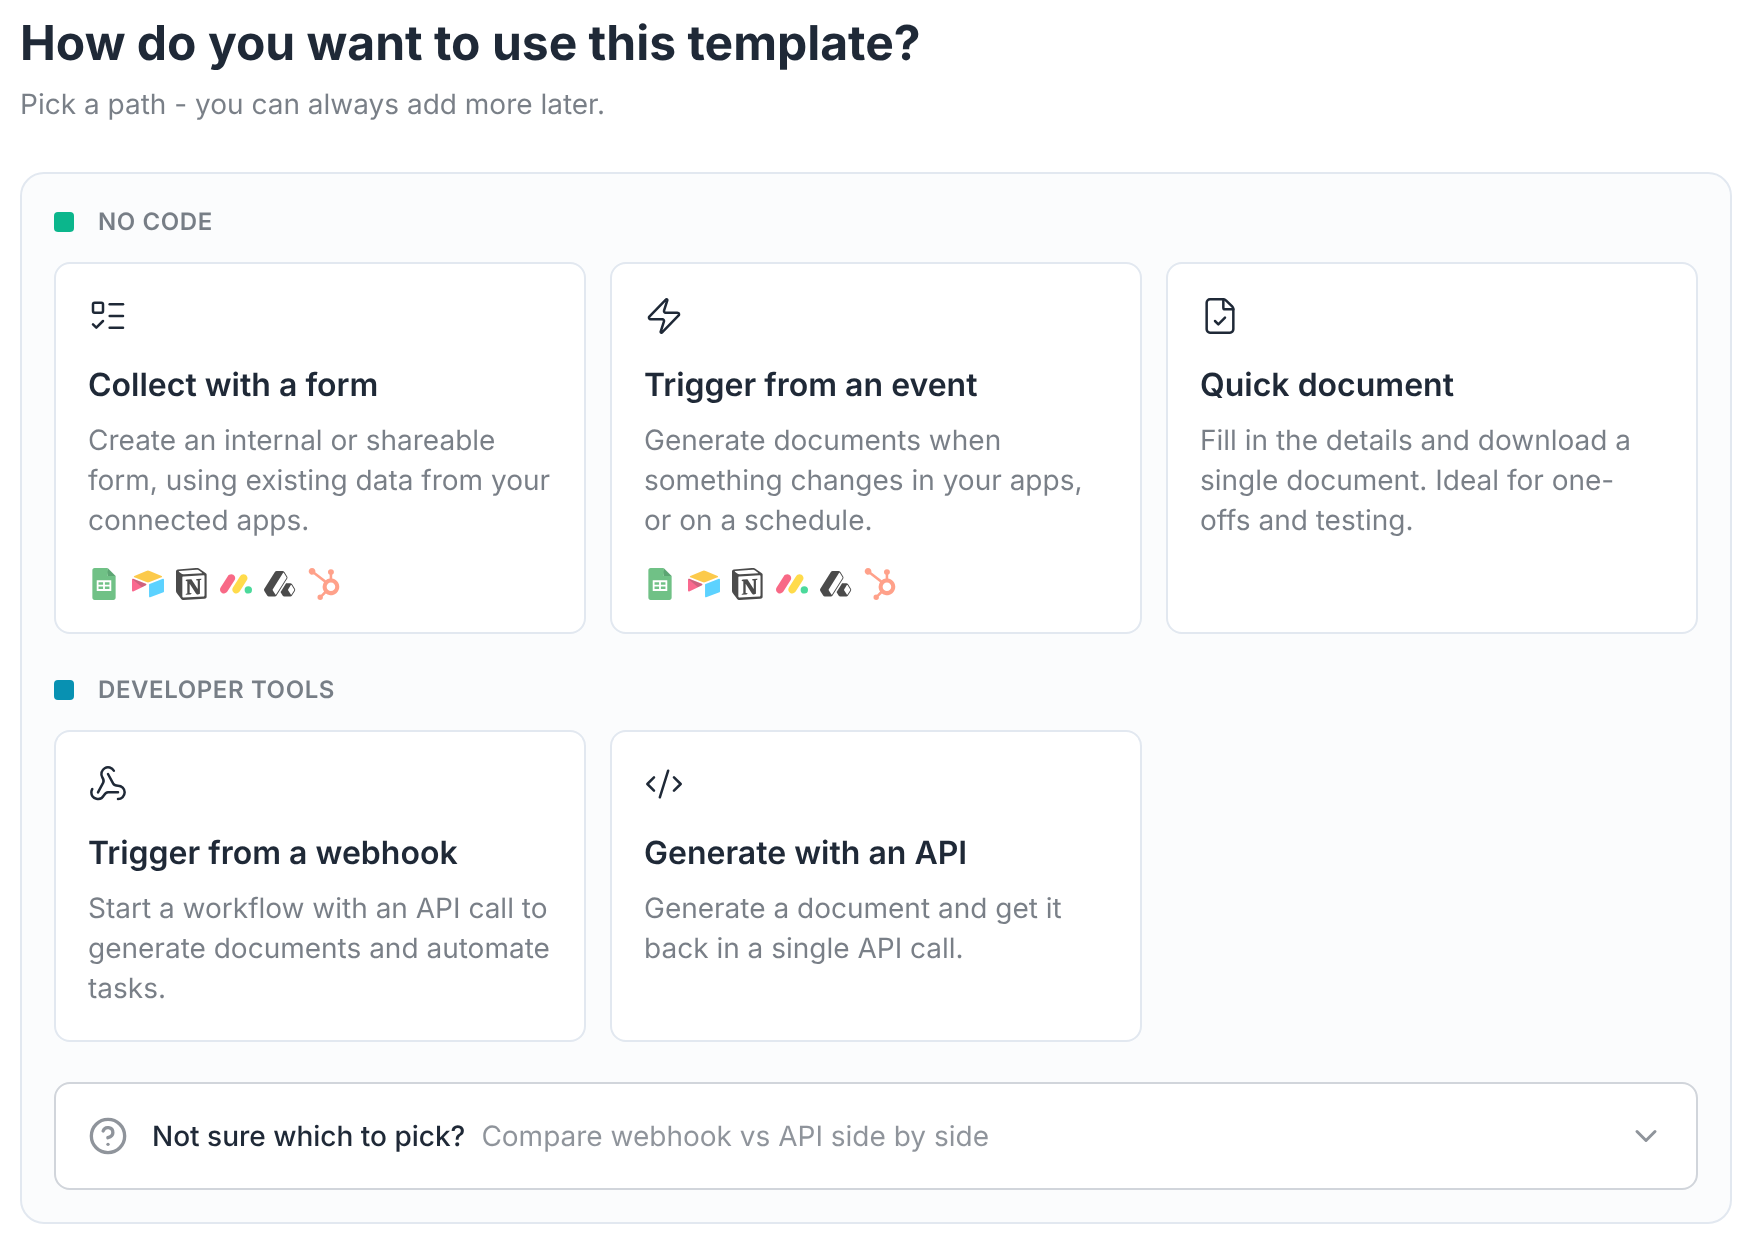
TemplateDocs creates a workflow with a form that has a field for every tag, a Document step that fills in the certificate, and an Email step. A few adjustments turn it into a certificate workflow:
- In the form designer, add an Email field for the recipient's address.
- In the Document step, change the format next to the Document name from DOCX to PDF.
- In the Email step, replace the To
Address with the Email form field (type
@to insert it). Write a subject and message.
2. Save a copy to cloud storage (optional)
To keep a copy of every certificate, add a Google Drive, Dropbox or OneDrive step after the Document step, and choose the folder to save to.
3. Start the batch
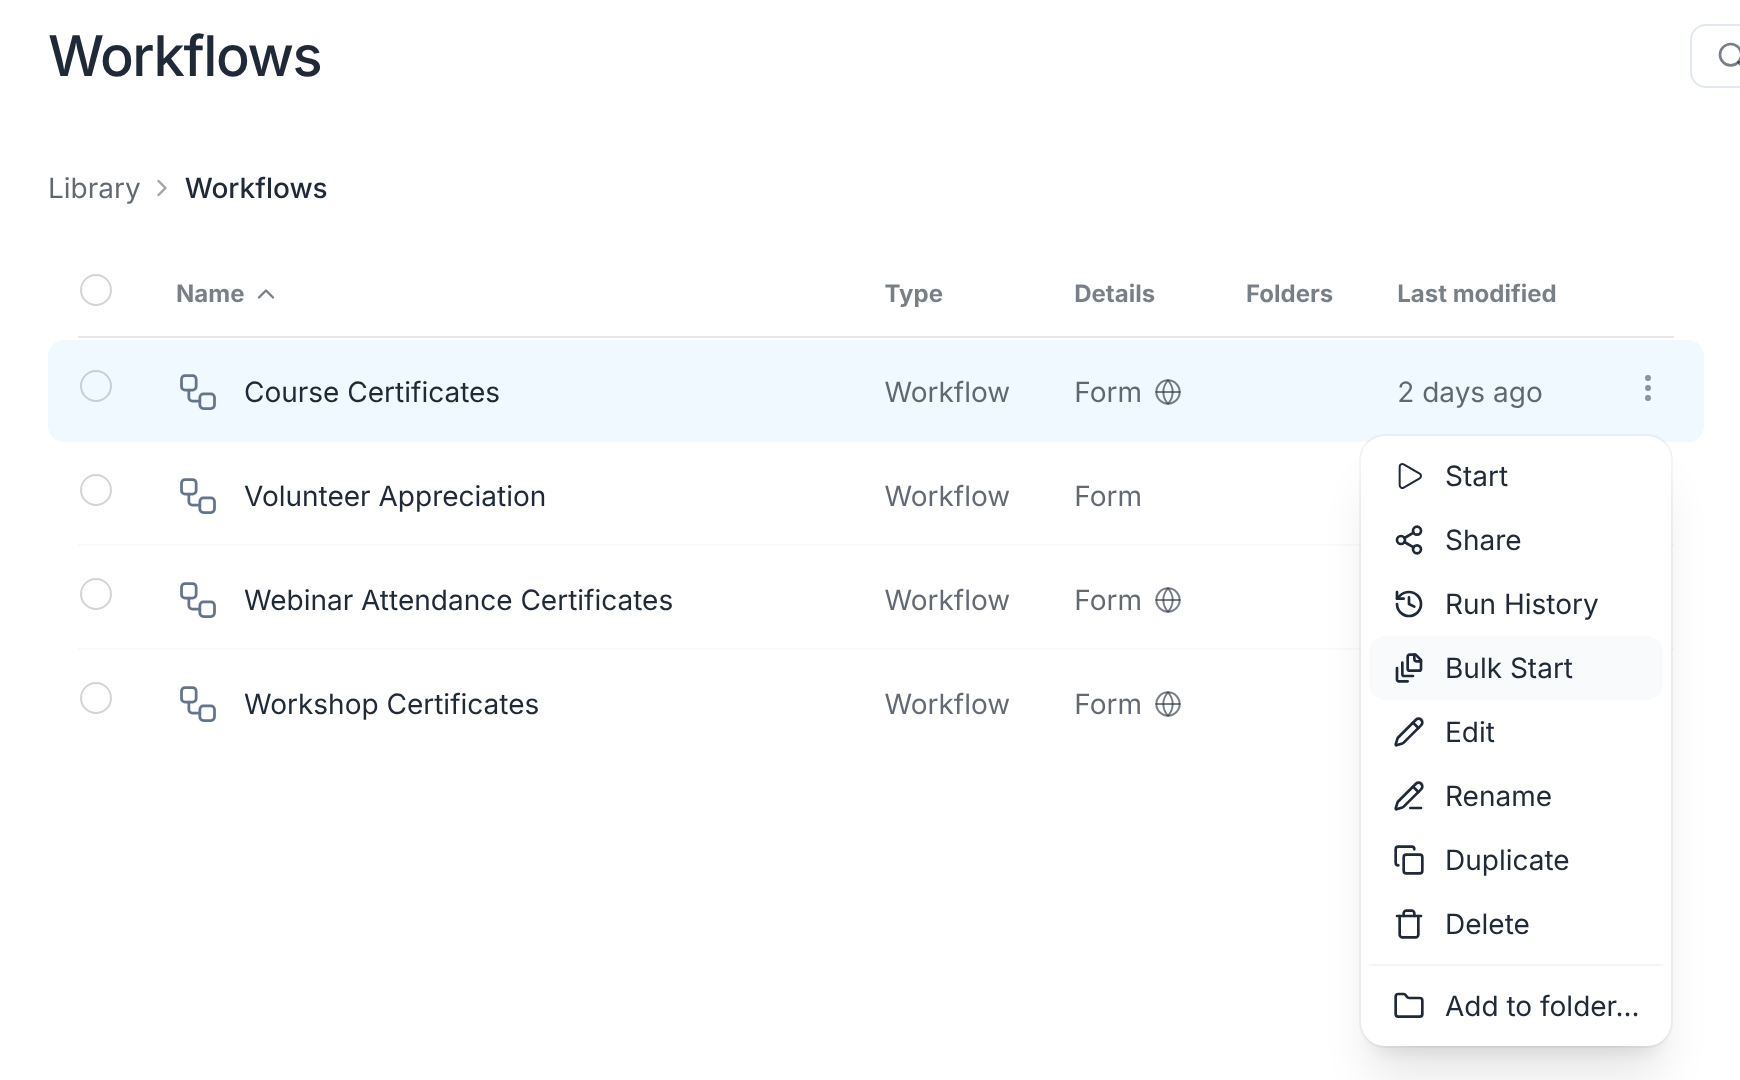
- On the Workflows page, open the workflow's menu and choose Bulk Start (or Bulk Test if it is not published yet).
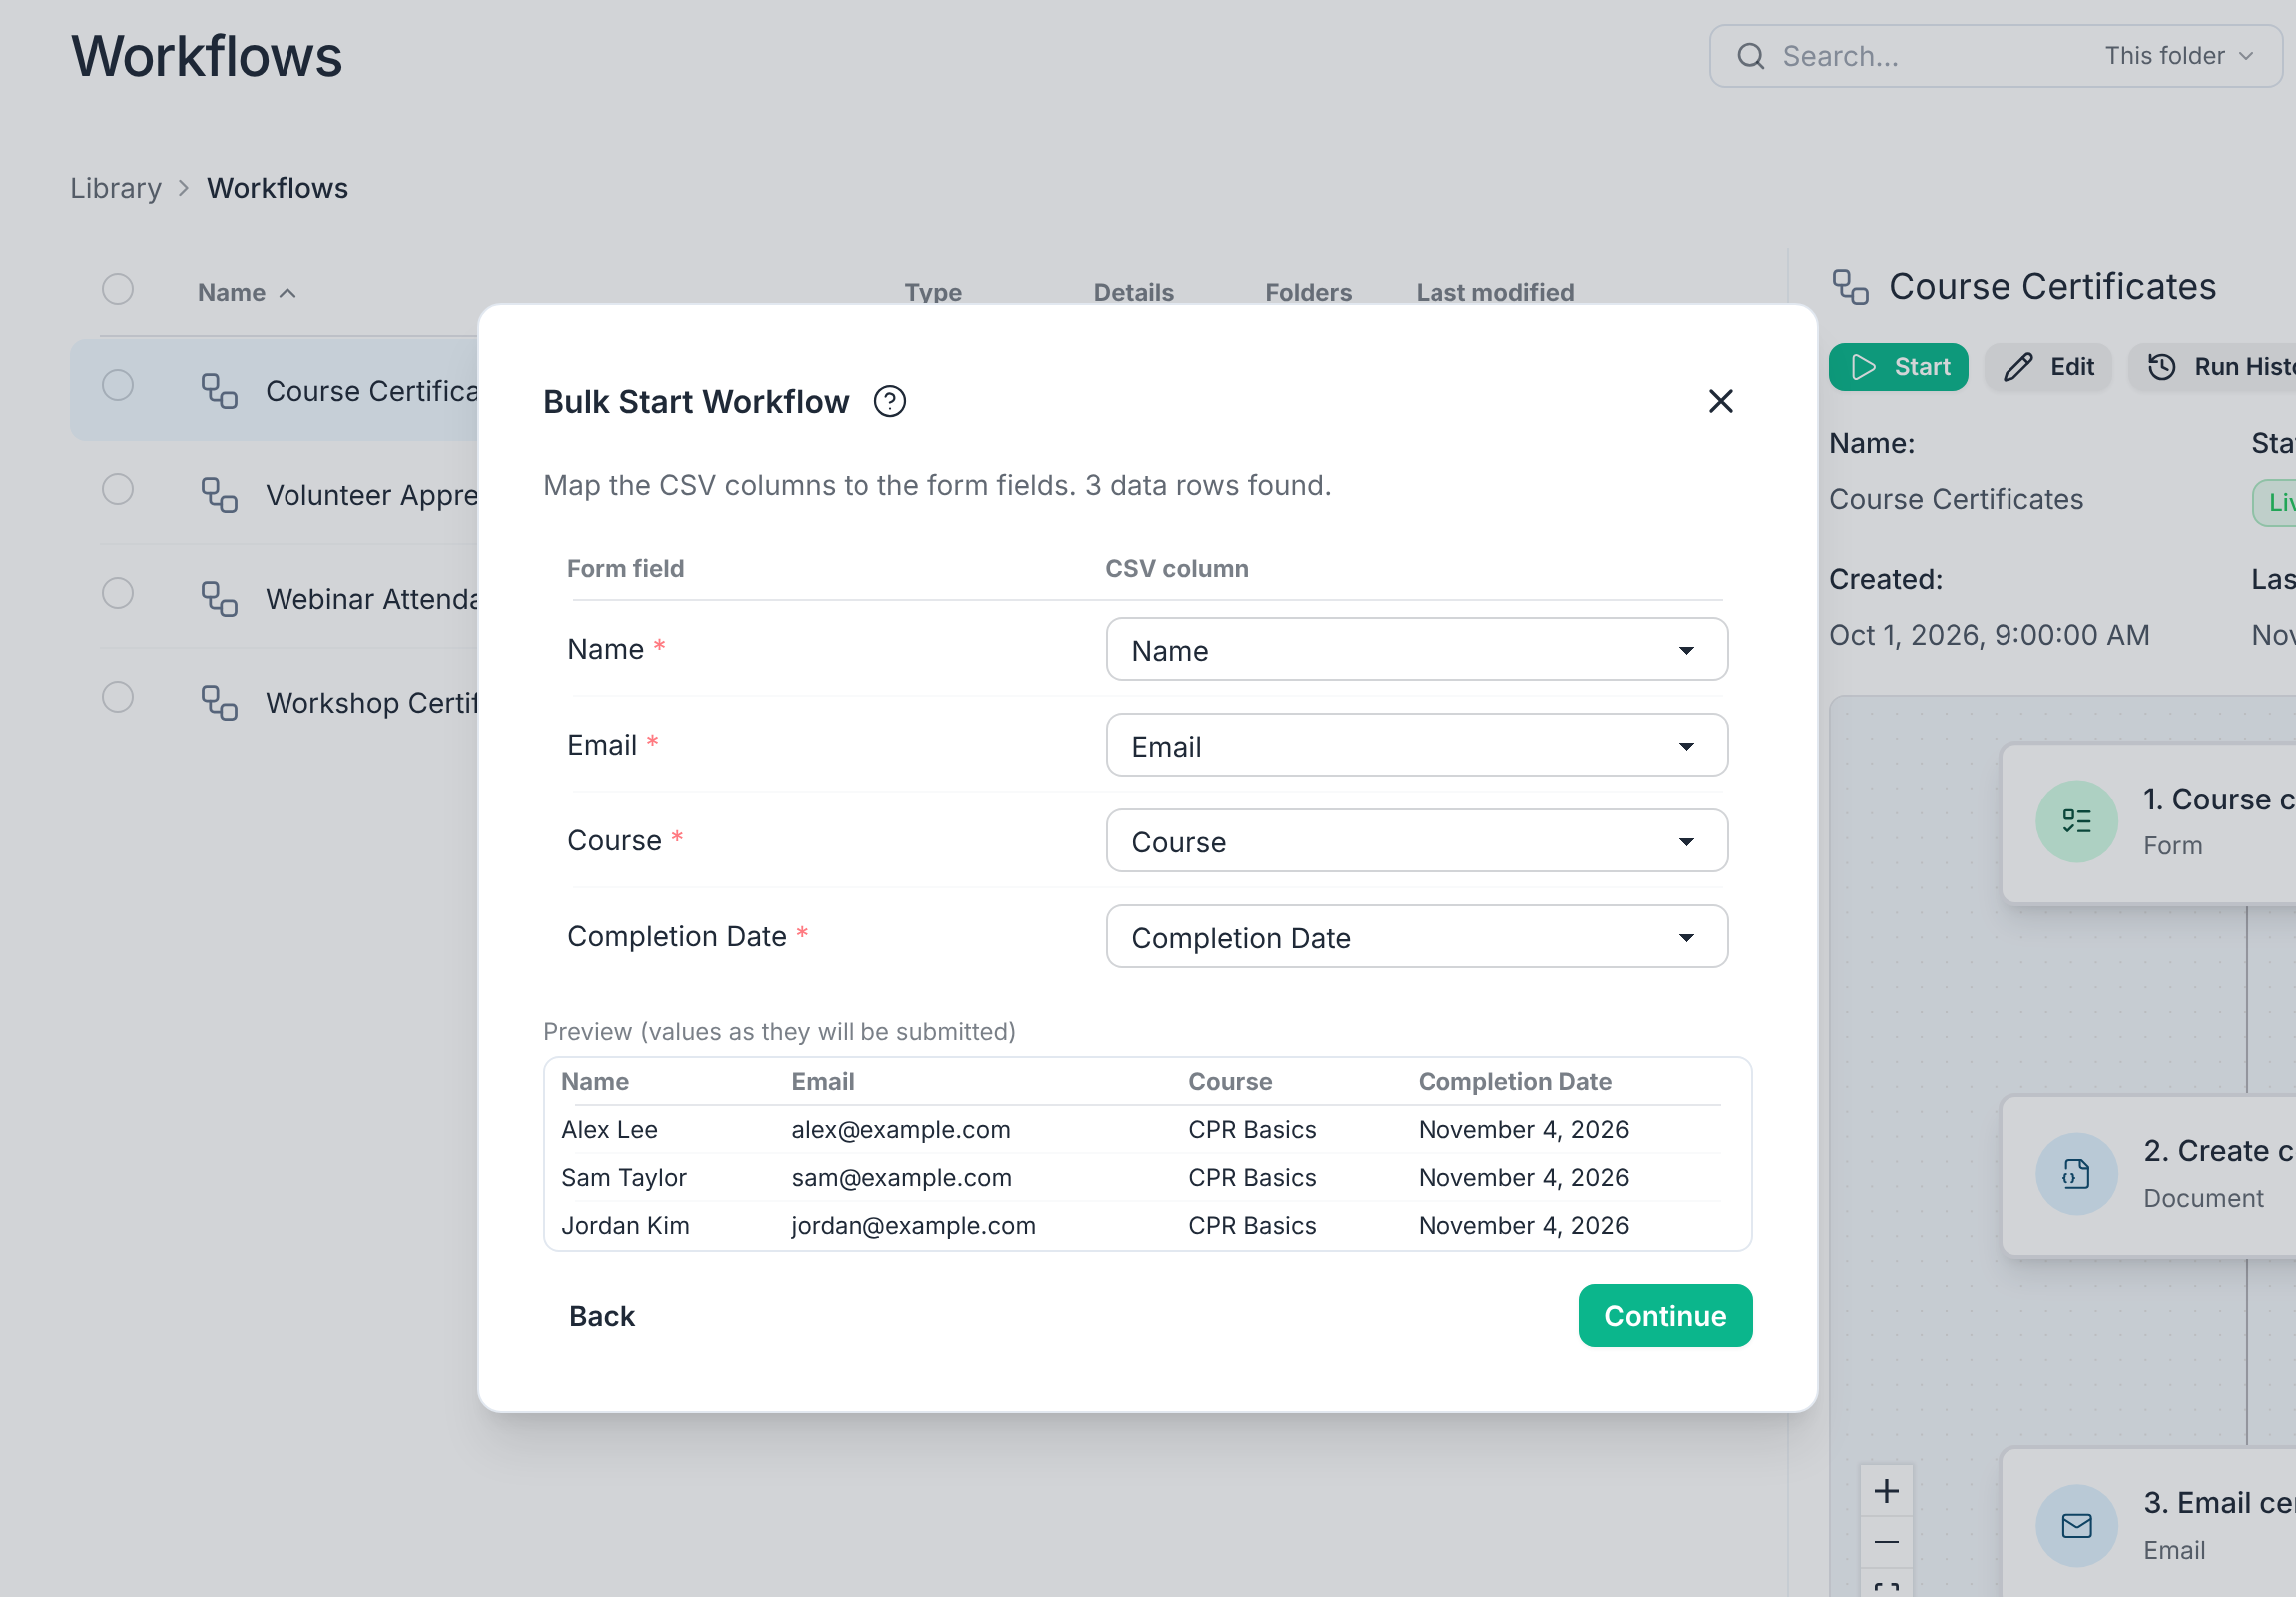
- Upload your CSV file and check the column mapping and the preview.
- Click Continue, review any validation results, then click Start N runs.
Each row starts its own run, so every recipient gets their own email with their own certificate. You can close the progress screen at any time; the runs continue in the background. The workflow's Run History shows each run, its input data and the generated certificate.
Test with a CSV file of two rows that use your own email address before you send the full batch.
On the free plan, emails can only be sent to members of your organization. See Delivery Policy for the sending limits.
Option C: Create a certificate for every new row
Instead of exporting a CSV file after every event, let a workflow watch your spreadsheet. Each time a row is added, or a student is marked as completed, the workflow creates that person's certificate and emails it.
1. Create the workflow from the template
- Open the certificate template. On the Overview tab, choose Trigger from an event.
- Choose Google Sheets (or any of the other supported data sources, including Airtable, Notion, and more) and click Continue.
- Keep Send an email on, name the workflow, and click Create workflow.
The workflow opens with the trigger selected.
2. Connect your data source
This guide uses Google Sheets as an example. Other sources, such as Airtable, Notion or HubSpot, work the same way: connect your account, choose the table or list to watch, and choose when a certificate is created. Each trigger's documentation covers its exact settings.
- Click Sign in under Account, then pick the spreadsheet and the sheet. Turn on Table contains header if the first row holds the column names.
- Choose when a certificate is created:
- Row added - every new row gets a certificate. This suits attendance lists that grow after each session.
- Row changed - pick a Column, such as Status, and add a
Rows must match condition, such as a Status of
Completed. Only the people who finish get a certificate.
3. Set up the certificate and the email
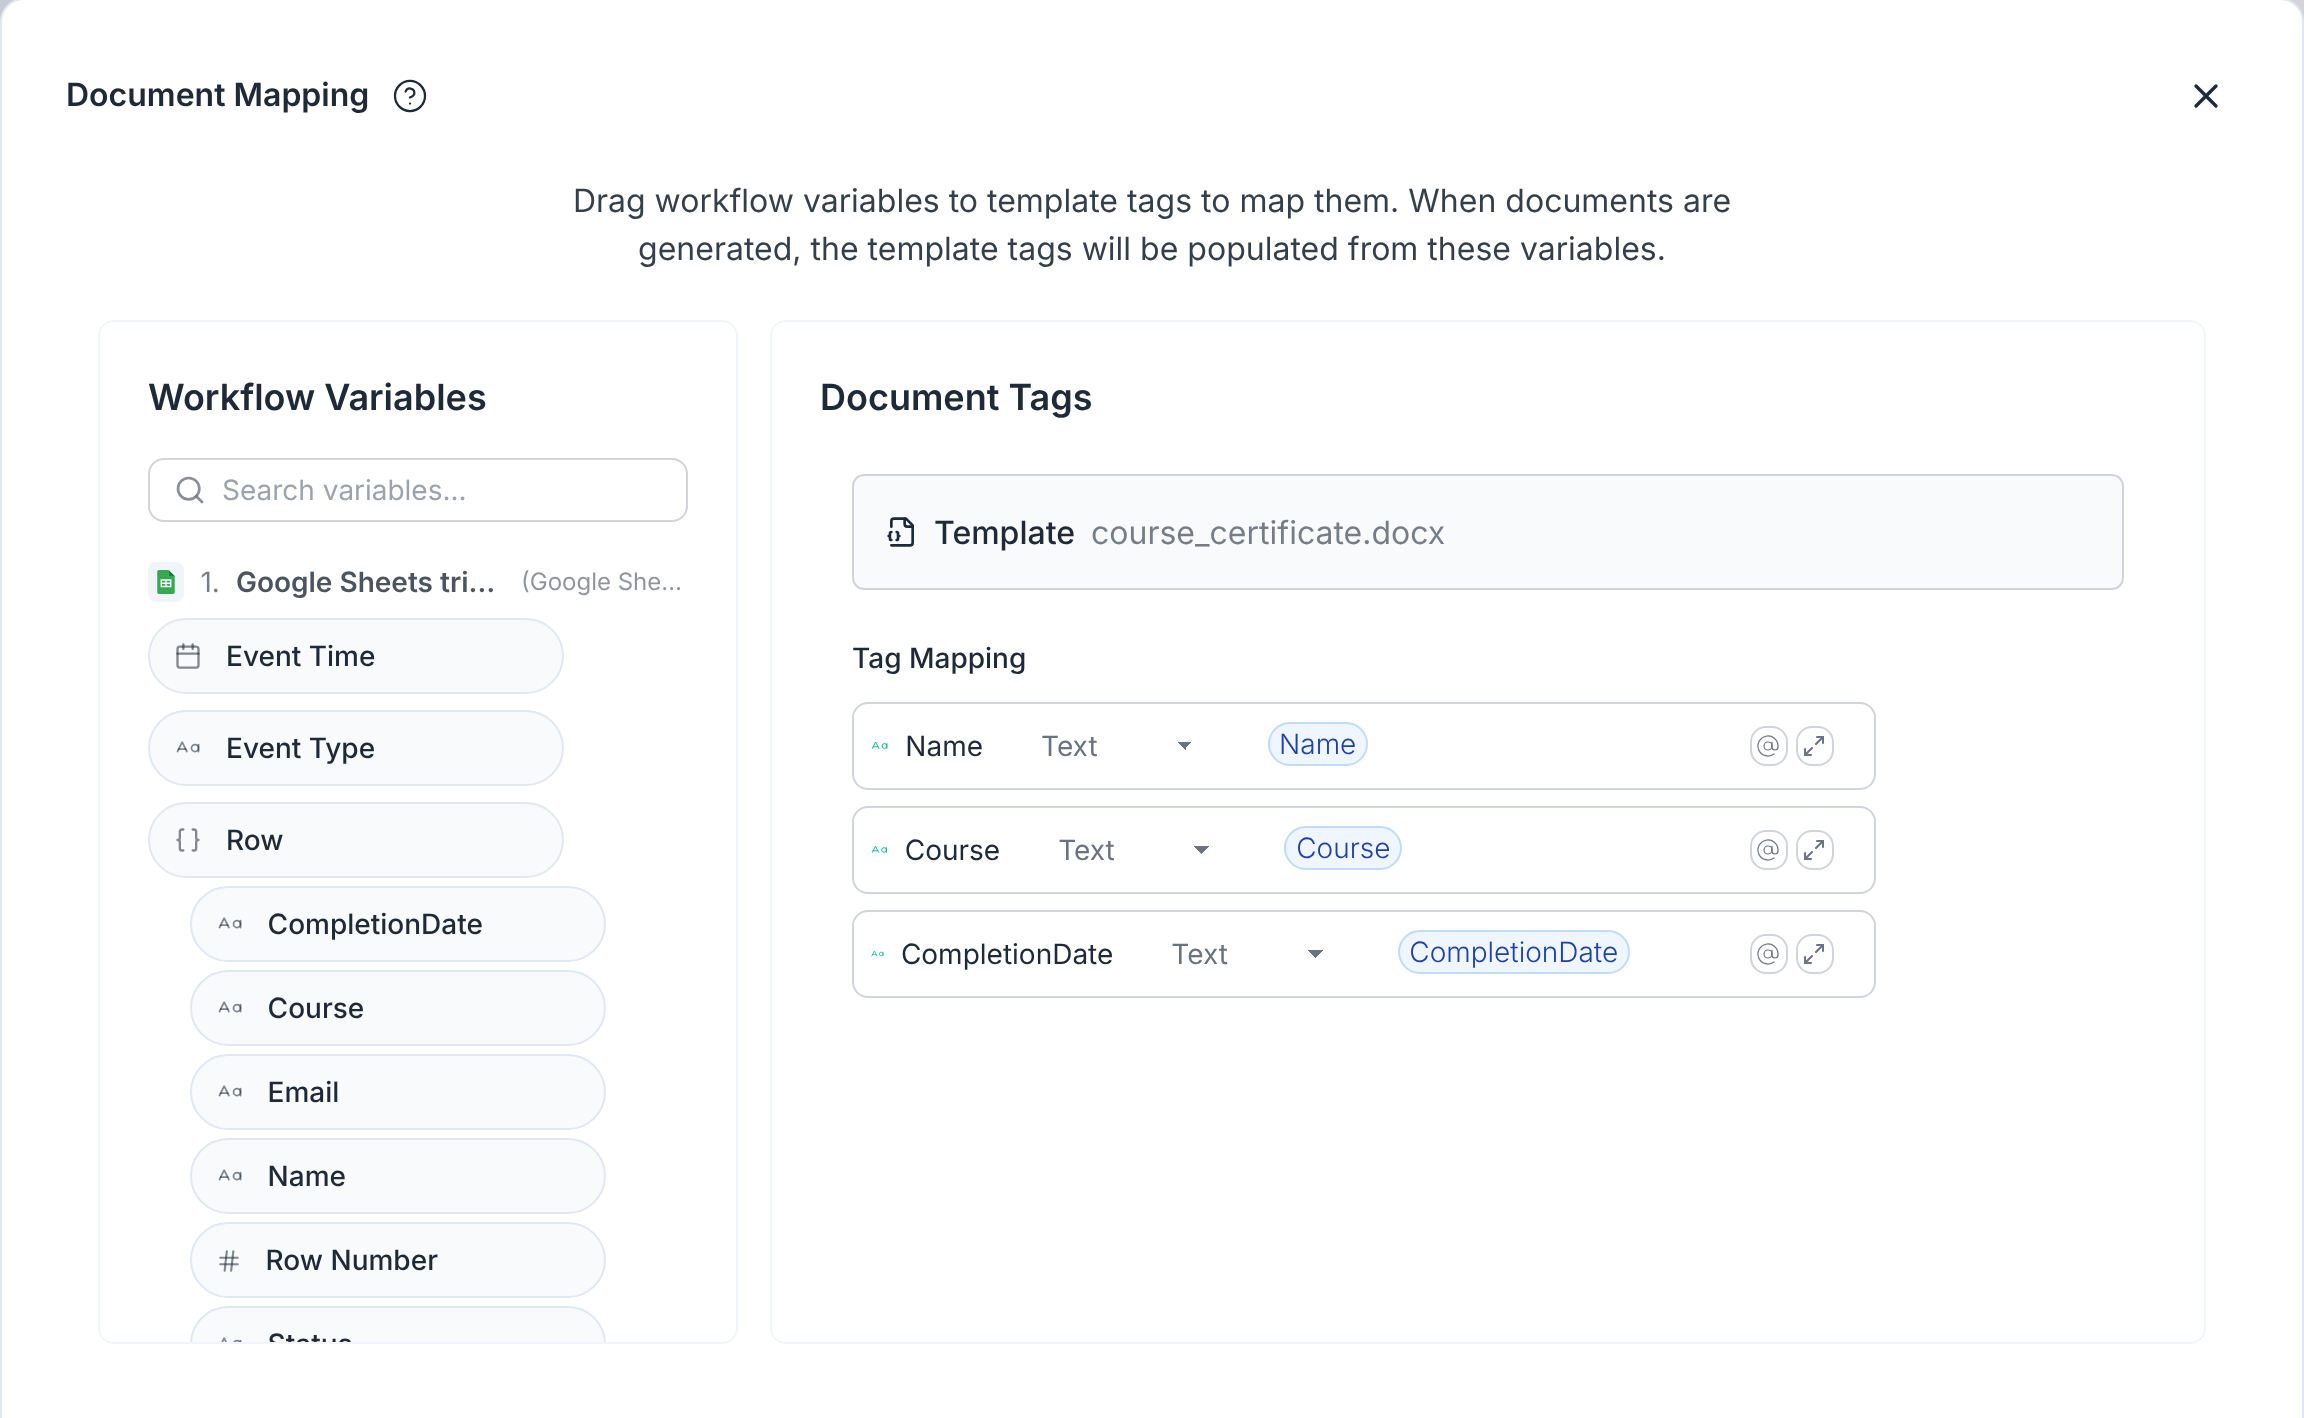
- In the Document step, open the Tag Mapping and map each tag to its
column under the sheet's Row. Type
@in a tag's field to pick the column, or click Get suggestions to let TemplateDocs map the tags for you. - In the same step, change the format from DOCX to PDF.
- In the Email step, insert the row's Email column into the To Address, and write a subject and message.
You can save a copy to cloud storage the same way as in Option B. To keep track of who received a certificate, add a Google Sheets - Write row step that fills a Certificate sent column.
4. Test and publish
- Click Test in the workflow editor and pick a row to try the workflow with it.
- When the certificate looks right, click Publish. The trigger only listens while the workflow is published.
- The trigger checks the sheet after a few minutes of inactivity, so each certificate goes out shortly after its row is added or changed.
Other data sources
Google Sheets and Airtable are just two of the apps that can start the workflow. The same flow works with other triggers:
- Records in HubSpot, Notion, monday.com and more.
- A webhook from your course or event platform, sent directly or through Zapier or Make.
- The workflow's own form, so attendees can request their certificate.
Frequently asked questions
Can I send each certificate to its recipient by email?
Yes. Use a workflow with an Email step, and insert the recipient's email field into the To Address. Each row in the CSV file sends its own email with its own certificate attached.
Can I save a copy of each certificate to cloud storage?
Yes. Use a workflow with a Google Drive, Dropbox or OneDrive step, and choose the folder to save to.
Can each certificate have its own QR code?
Yes. Add a tag to the template, name it whatever you prefer, for example {{ QrCode }}. Then, set its type to QR Code in the template's Quick Document tab, or in the Document step's Tag Mapping when you use a workflow. Add a matching column to your data source (for example "QrCode") with each recipient's verification link. Each certificate gets a code that points to its own link. See QR Codes for size and color options.
Can I use Google Sheets or Airtable instead of uploading a CSV file?
Yes. Connect Google Sheets, Airtable and other data sources to automatically create a certificate whenever a row is added or marked as completed. See Option C.
How many certificates can I issue?
As many as you need. With a Google Sheets or Airtable trigger, every new row creates its own certificate, with no limit. CSV uploads run in batches of up to 100 rows for a workflow, or 25 for a Quick Document, so for a longer list you can split the file and start one batch per file.
Will the generated certificates look exactly like my Word design?
Yes. Only the tags change. Fonts, borders, background images, page orientation and layout are kept as they are in your Word document.
What does it cost?
Each generated certificate uses credits, like any other document. You can start for free. See Credits and the pricing page for details.
